Today

An early morning snow fall and a blooming amaryllis help to lift my heavy heart.

My wonderful Father is quite suddenly very sick.


Scheduling Time


Yesterday started my attempt to work within a weekly schedule. It isn' my natural way to work. And it isn' that I need a schedule to get things done. I work really hard everyday and every minute of every day! 

It's just that there are a couple of things that always get put aside because there is always a long list of things for me to accomplish for the business of CherScapes. I have had to come to the realization that that long list will always be there. Tasks get added to the list just as quickly as I can cross things off. And sometimes even quicker!

I won't ever be able to finish everything on the list. Duh! That's a tricky one for me as I love to get things finished.

At any rate, the 2 things that significantly add to the quality of my life that seem to always get pushed to the bottom of the "To Do" list is working on my own artwork (as opppsed to the artwork I post on Etsy) and (drum roll please) living in/with a clean house.

So, I work at my part time job Monday - Wednesday from 4-9:30, or earlier if they need the extra help. It is a great schedule for an artist, as it frees up all my daytime.

Here is the new schedule:
Tuesday - Friday - the business of CherScapes which includes product design and making new product. The first hour is emails, then posting on Etsy.
Saturday morning is reserved for photographing new Etsy items. I have to take enough to get me through the following week. 
Saturday afternoon and Sunday is to work on my own personal artwork.
Monday I clean house and do laundry. 

I did fairly well yesterday - all things considered. I hadn't taken any photos on Saturday, so I did it yesterday morning and started in on my own work at 2:00. I took a break to make dinner and eat but was back in the studio until 9:45.

The difficulty today is to stay out of the studio to continue working on that piece. But I am committed for the long haul. A clean and orderly house make me so happy and keeps my anxiety levels down. It also makes a big difference to my son who is highly allergic to dust mites. 

So without further adieu, I leave you now to go get my mop and bucket!

Here is a picture of the front of my house. Somewhere in all that snow is my front door!


And what about you? Do you work better with a schedule or not?

Snippet

Here is a quick snippet of my work table today. I spent the last week or so fighting a bad cold and getting ready for a batik gig at Northeastern University in Boston. Fortunately the gig was rescheduled. Thank you kind people!

Now I am working in my art journal - using up some stencil designs/pieces made for the batik samples. It is not finished but I am excited. I started out using a reject page (wish I had taken a picture of that first). 


I'll post again as I get closer to the finish line. I think I need to cut more leaves. A funny concept, since I am supposed to be using up scraps. Not making new ones !

I'll be digitally printing this on silk when I am done - can't wait!

In the meantime I'm linking up with Nina Marie's blog for Off the Wall Friday. Head on over there to get a peak at what some other fiber artists are up to.

Stenciling with Shiva Paintstiks - Part 2

Several days ago I posted about stenciling with Shiva Paintstiks on a jacket I was embellishing for a client. I had decided to use the opportunity to make my first free tutorial.

Because of our antiquated wifi connection it became clear that I would have to upload the video during the night time when no one else was on the internet. So it has taken me several days to remember to do that before heading off to bed. At any rate here it is - a beginner video for sure. But in the spirit of easy going and more personal blog posts I am going to share it with you in the raw. I apologize for the view point of the camera in the first half - you'll see what I mean when you try to look through my right shoulder and arm to see what I am doing! LOL. Also it is verrrrrry long.


To see the original post just scroll below.

The stencils I used in the video are available for purchase through my Etsy shop here.

Stenciling with Shiva PaintStiks

Today I pulled out a job I am doing for a client of mine. She has a couple of white jackets she bought from Dharma Trading and has asked me to dye and embellish them. I finished dyeing them the other day and am now ready for the embellishments.

I decided to use Shiva PaintStiks with one of my stencil designs. I have chosen to use the paint sticks because I am planning to put a  lot of imagery on the jacket. If I used textile paint it would surely leave an undesirable hand to the fabric - simply because I would be using so much paint. A smaller application of paint would work just fine. But that isn't what I will be doing.

I also decided that this would be a great opportunity to make my first free, video tutorial. Clearly I have much to learn about making and editing videos. LOL But in the spirit of being more relaxed about this blog, I am going to share the video here even thought there are many areas in need of improvement!

My apologies about my arm and back often being in the way of your view! But here goes... Oops

Looks like my internet is too slow to upload the video during the day when other people need to be online. I'll upload the video tonight just before we all go to bed. In the meantime here are some photos of the finished jacket.

This is the right front side - Center front opening is along the top edge

Detail

Full front view

Back

Doesn't it look regal? The fabric is a loosely woven rayon but because of the dye and paint sticks it looks like machine embroidery on velvet.

Click on the images for a larger view.

Hand Dyed Silk!


Okay, I am indeed a day late but here is the beginning of the silk I dyed on Tuesday. All the pieces now have to be ironed, measured and hung on hangers.

This is about half of what I dyed. I'll start listing them on Etsy over the next couple of days.


O my gosh, that zig zag is crazy. I think I am tired. I put the stool up in one spot and simply turned the camera from side to side. LOL    And too tired to do anything about it!


Getting Ready To Dye Silk

Just put blogger on my new iPhone. Yeah! Blogging should be easier now. I'm trying to be more easy going, simpler and make less of a production of every post and everything else in my life. 

Sooooo, I am snowed in today and am about to work on a silk dyeing venture I started a couple of days ago.


That's it for tonight. The dye is on every thing. Soda ash is next, then I  am done until tomorrow morning. See you then!


New Year's Reflections - Stencil & Fat Quarter Designs on Etsy!

The new year is now in full swing. And although I have never thought of myself as someone who makes official new year's resolutions or celebrate on New Years Eve, I realized this year more then ever that I do actually think of goals for the coming year. Mostly goals for my business. But with that said, my business is about art making. That in and of itself makes it feel very personal.

I think it starts happening in the early fall - which would explain why that by the time the new year starts I am already in full swing of my ideas. So it doesn't really feel like a new years resolution - but in actuality it is.

The fall is my favorite time of year. Living here in New England the views are incredible. I have lived here all my life and yet continue to be awestruck each and every year. However it isn't just the colors and the obvious beauty that compels me to love that time of year. I also love when the sky turns a certain color of grey that speaks of winter - when the leaves turn brown and fall away to the ground - the barren trees - and the musty smell of the forest floor.

I always have a little thrill the first time I feel the need to turn the collar up on my jacket and dig my cold bare hands deep into my pockets. I love the first frost and how frisky the dogs are when they come into the warm house after a jaunt around our property. Even as a young teen I saw the coming of winter as a time of reflection - a chance to be still and look inward. It is a gift of rest for those of us whose eyes are like visual sponges - banking in every image we see. I breath a sigh of relief when winter and the snow arrives.

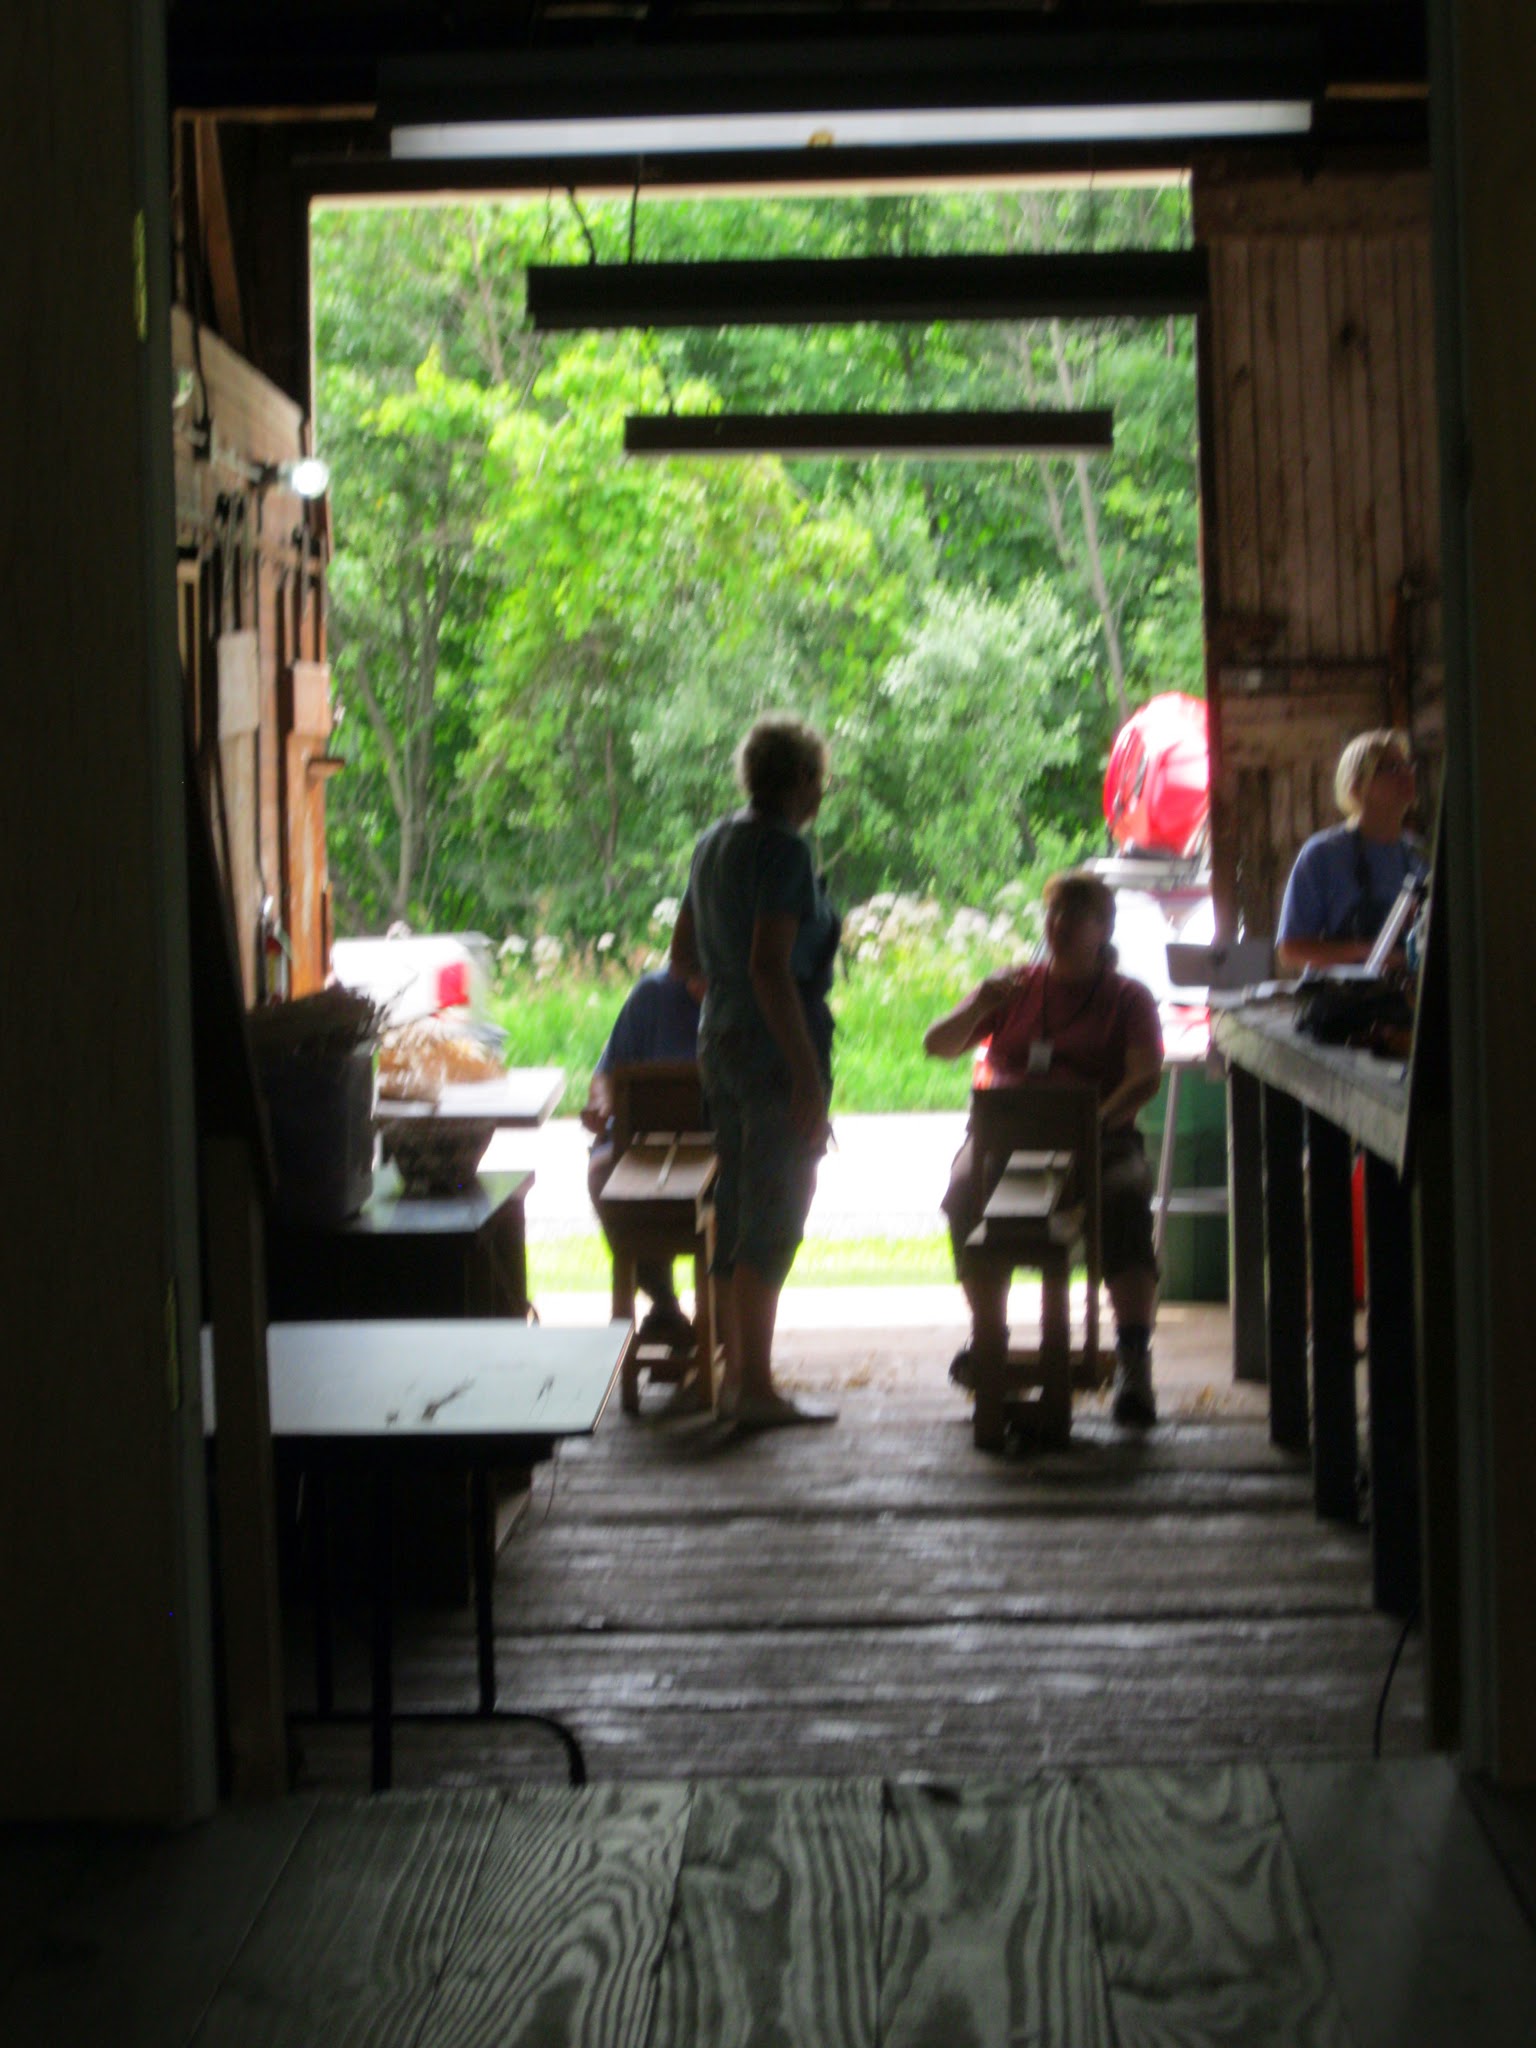
On this past New Years Eve we sent my middle child off to India for a semester abroad.

My son August on the right with fellow traveler Jesse.
He is in his third year of a 5 year Architectural program. It was important for him to choose a college that is driving distance from home, Because of this decision we have never gone more then 5 weeks at a time without seeing him. So India for almost 5 months is a huge leap for all of us. After sobbing like a baby, I turned to my husband and said that this must be the wings part of parenting. You know the old saying - where our job as parents is to give our children roots and wings. His wings have been unfurling for a few years - but now they are actually outstretched and he is flying. He isn't flying alone yet - but that will come soon enough. You can learn more about his journey as an architecture student here.

I am acutely aware of how little time I have left with my youngest still home. He is a junior in high school. The college search will be in full swing now that this semester has begun. I will miss him greatly when it is his time to leave. We are a close family. My husband and I have been fortunate to have had teenagers who wanted to spend time with us - have had long in depth conversations - laughed - and continue to share of our lives - successes and failures.

Also - this past fall my husband was diagnosed with Parkinson's Disease. This is a journey that of course we had not expected. But it is ours none-the-less. We don't know yet for the future - but with a new medication regime I have a bit of the old person back with me again. For that I am grateful.

Alas, we never really do know of the future - I suppose I am coming into the age bracket where more people will get sick - some will die. Last year a friend/student and fellow art quilter passed just after Christmas. She was in the heat of trying to find her own visual voice. Another friend lost his wife and a new grandbaby has come into the life of yet another. And life goes on - amazing really.

My plans for the new year encompass more teaching and writing and much more art making. I'll be teaching in June at the Michigan League of Hand Weavers Fiber Conference as well as delivering the key note speech. And my new book proposal is out there trying to find a good home.
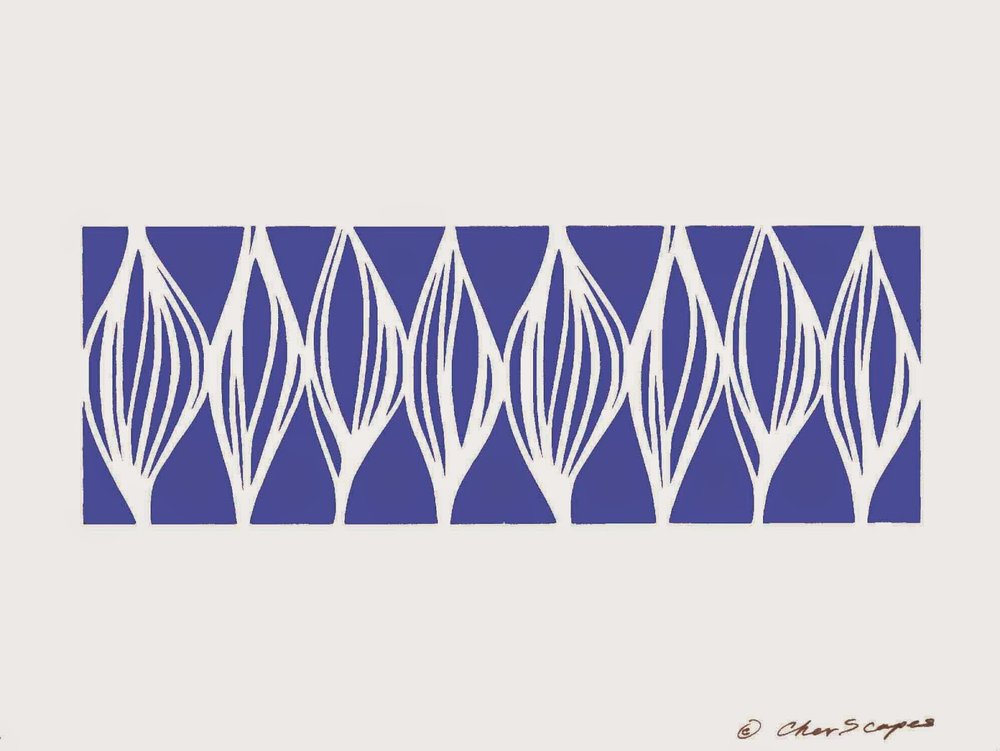
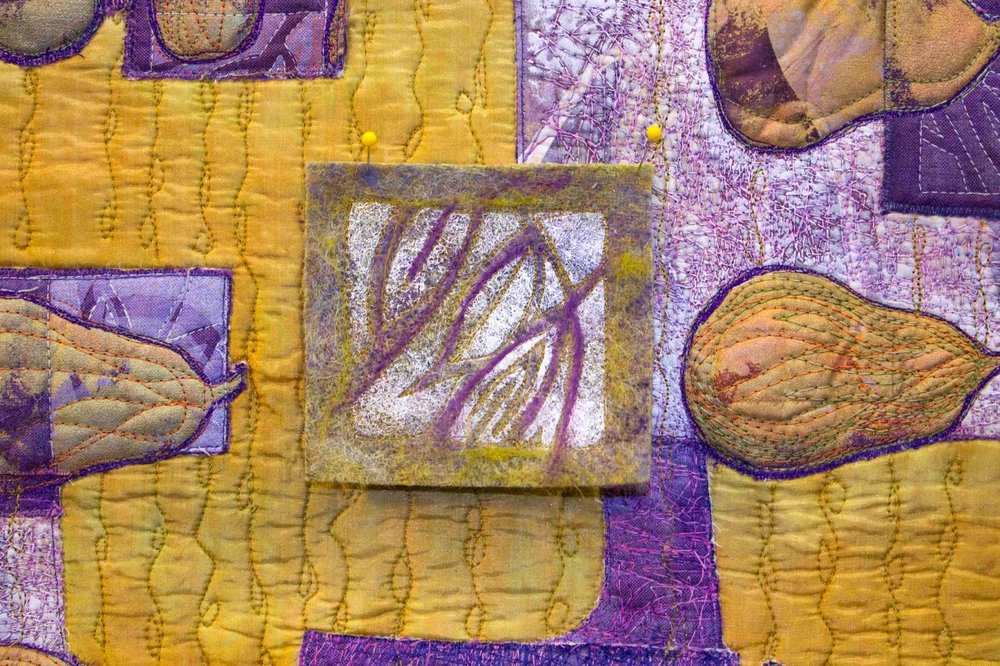
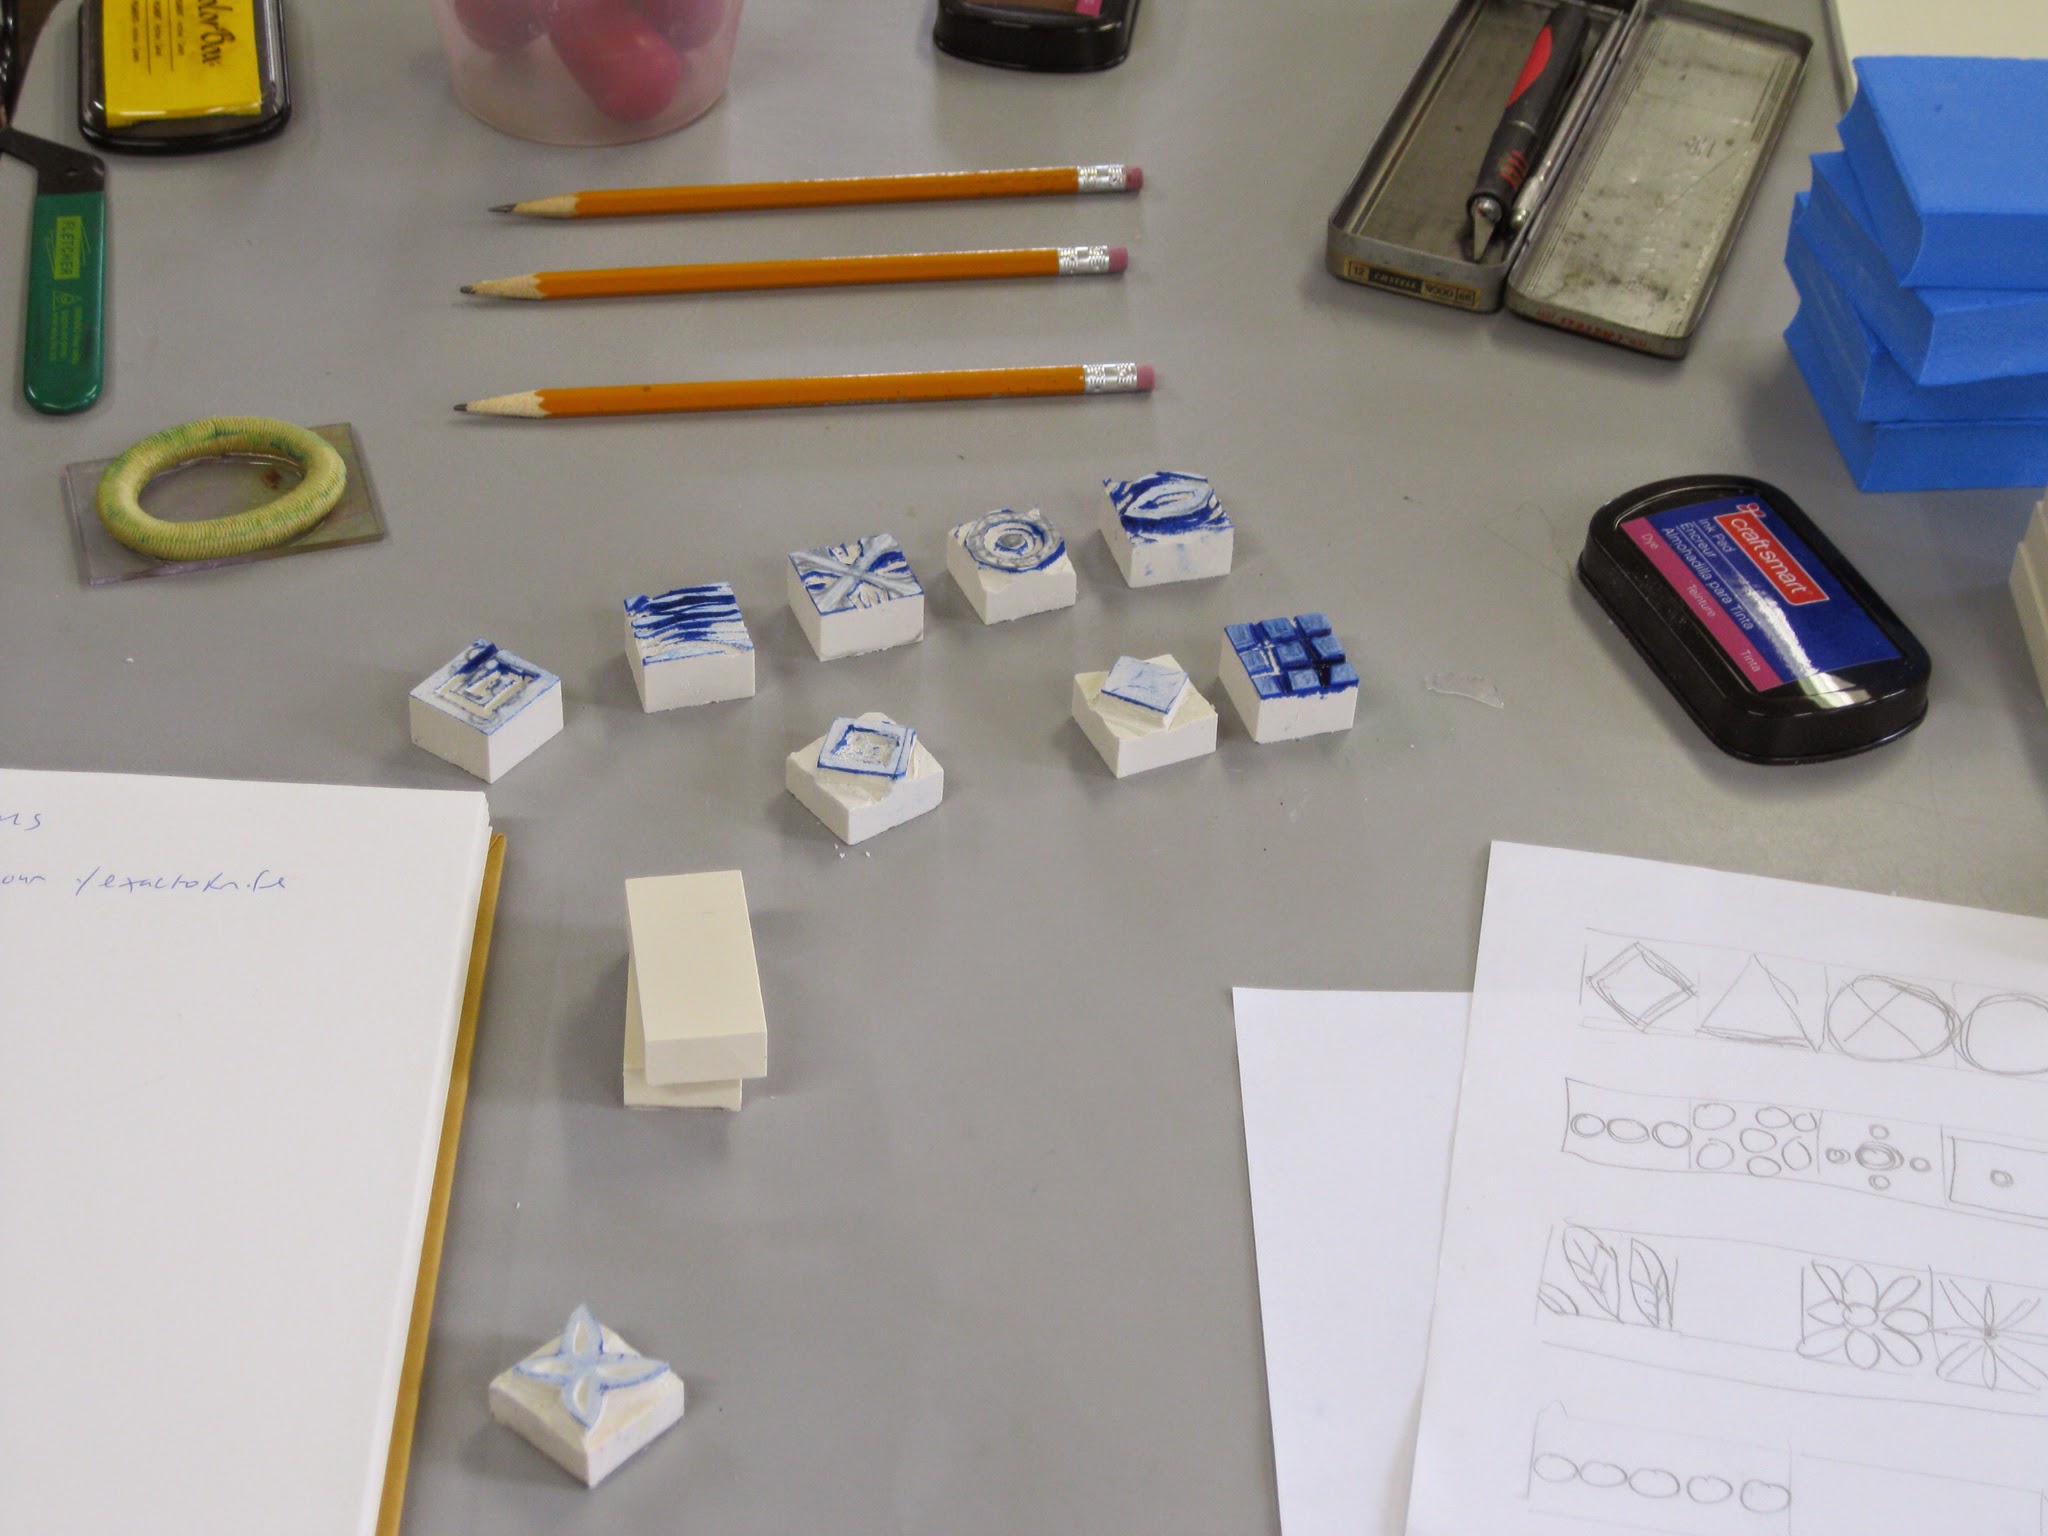
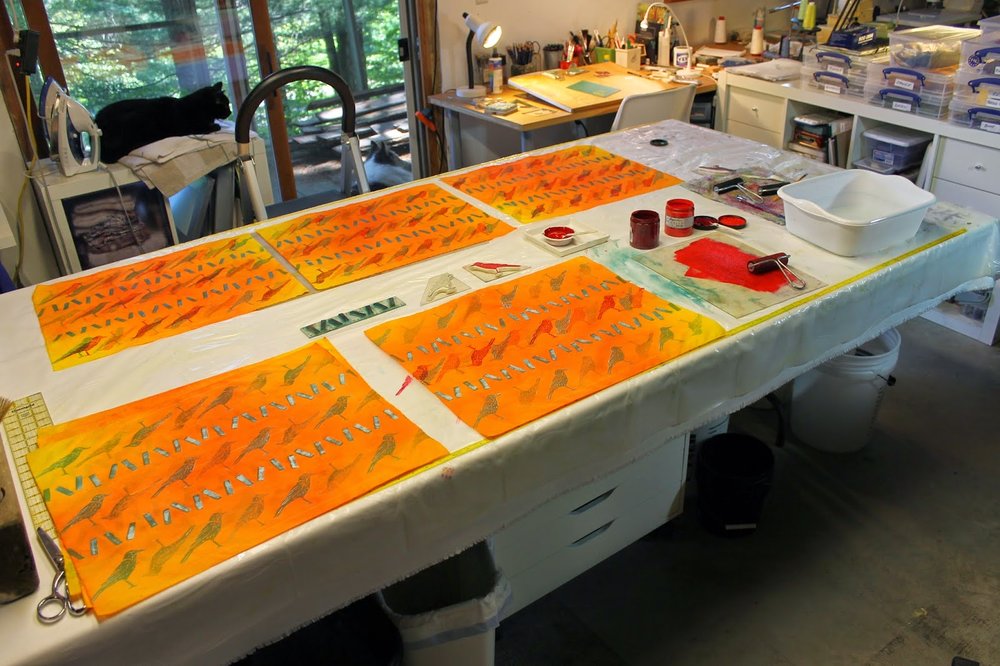
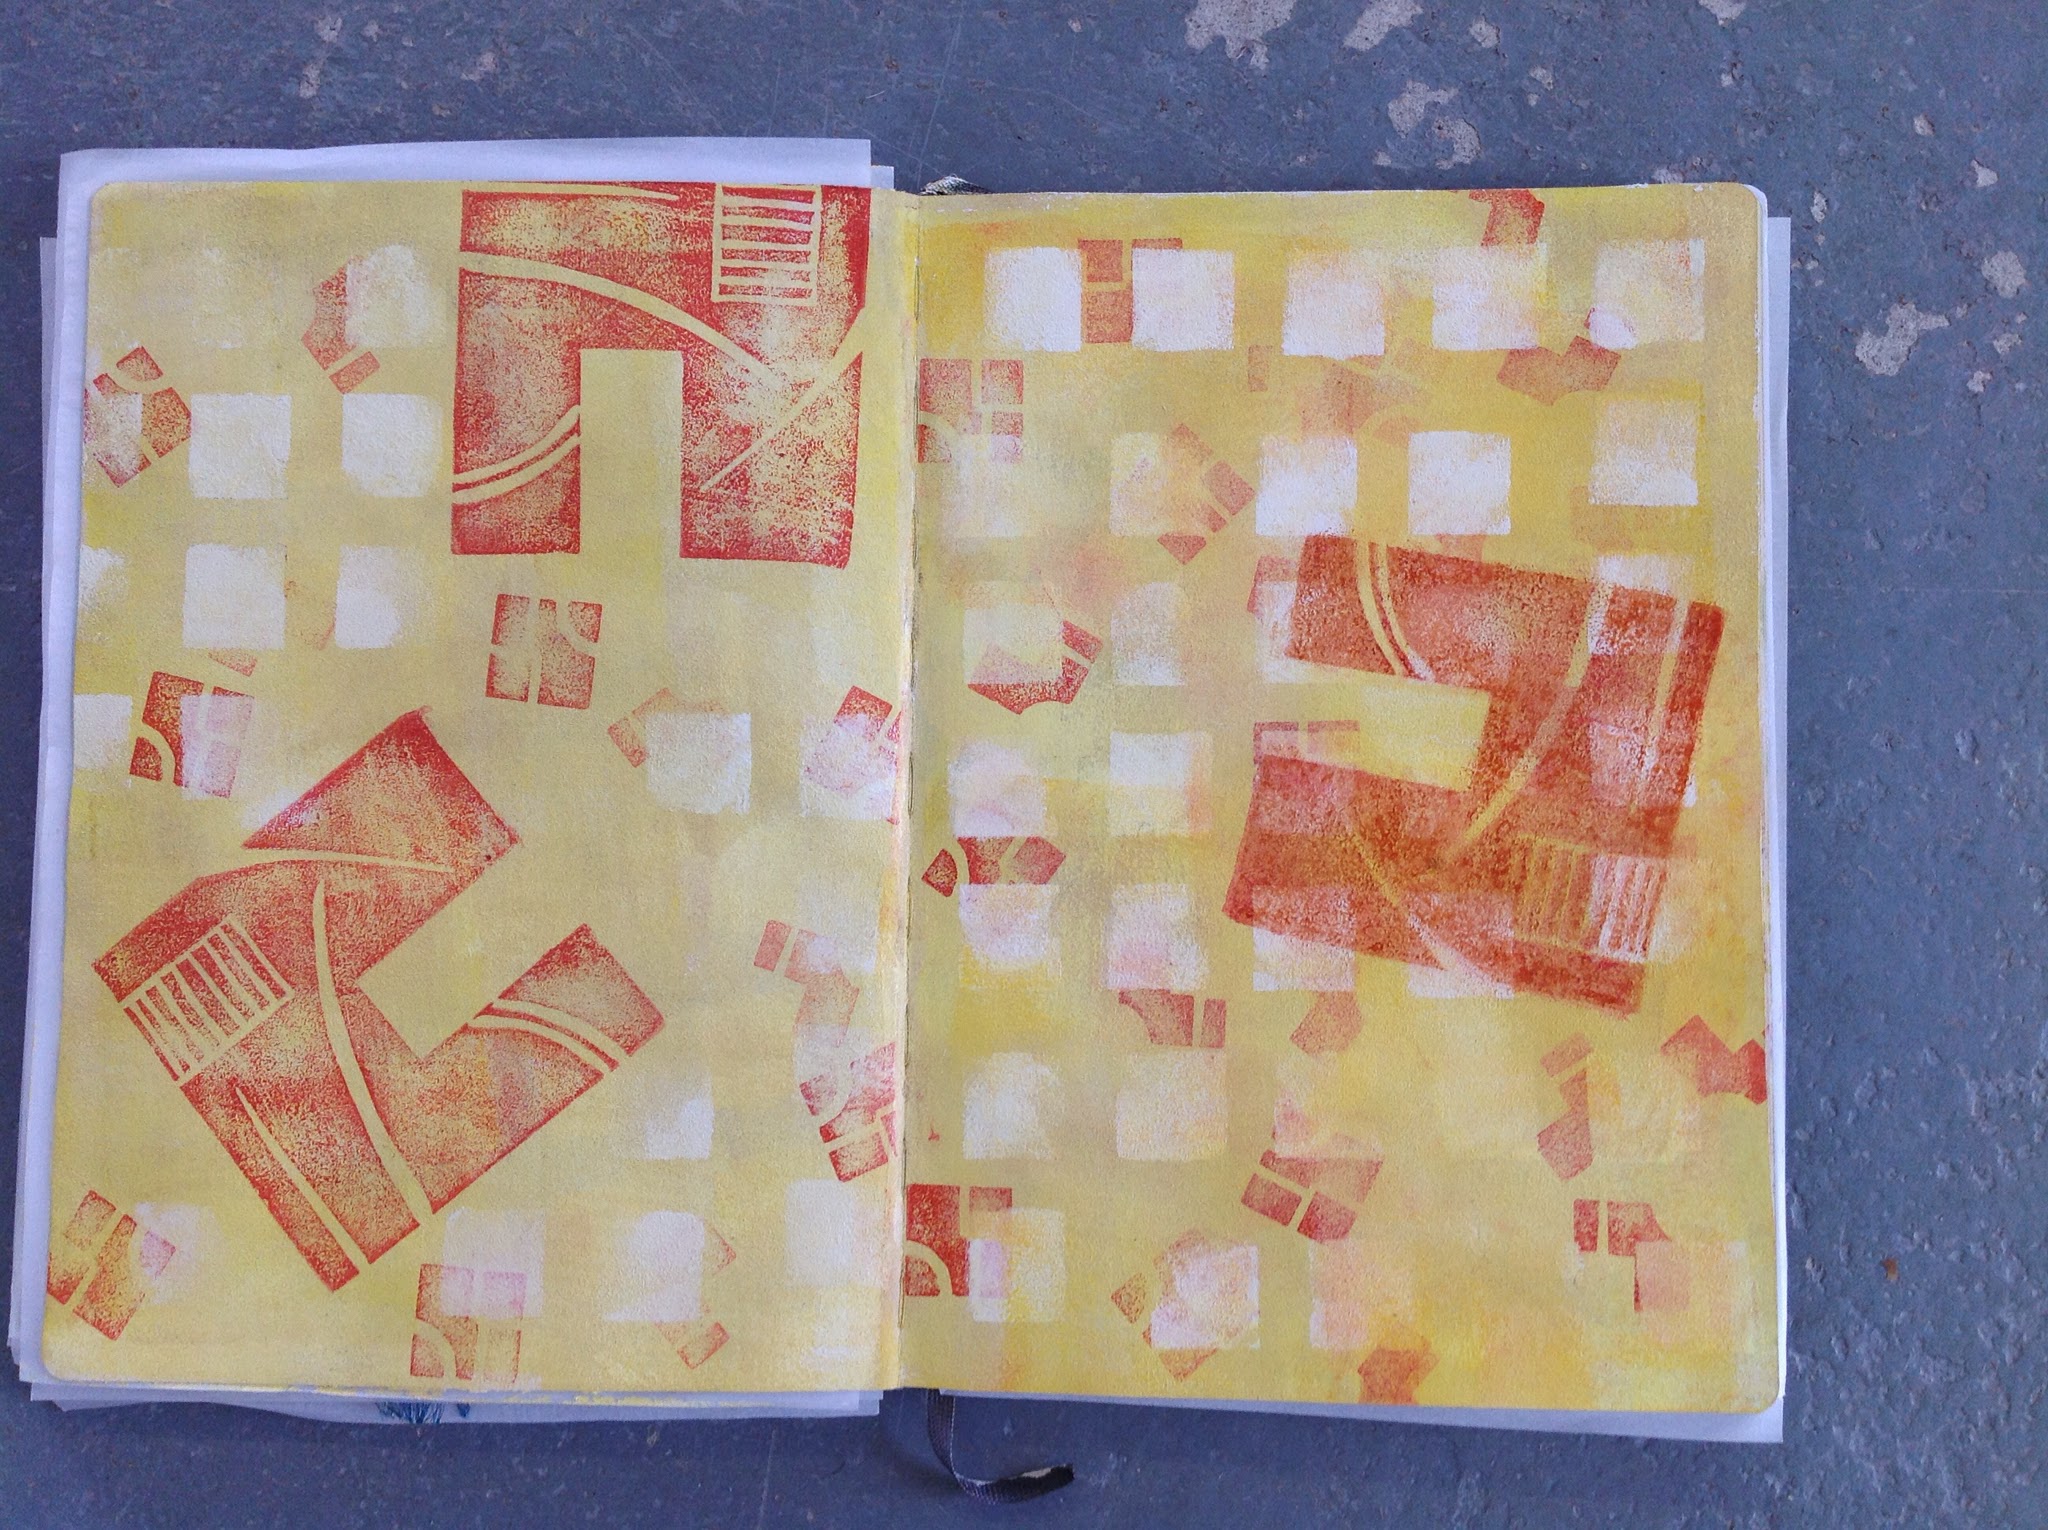
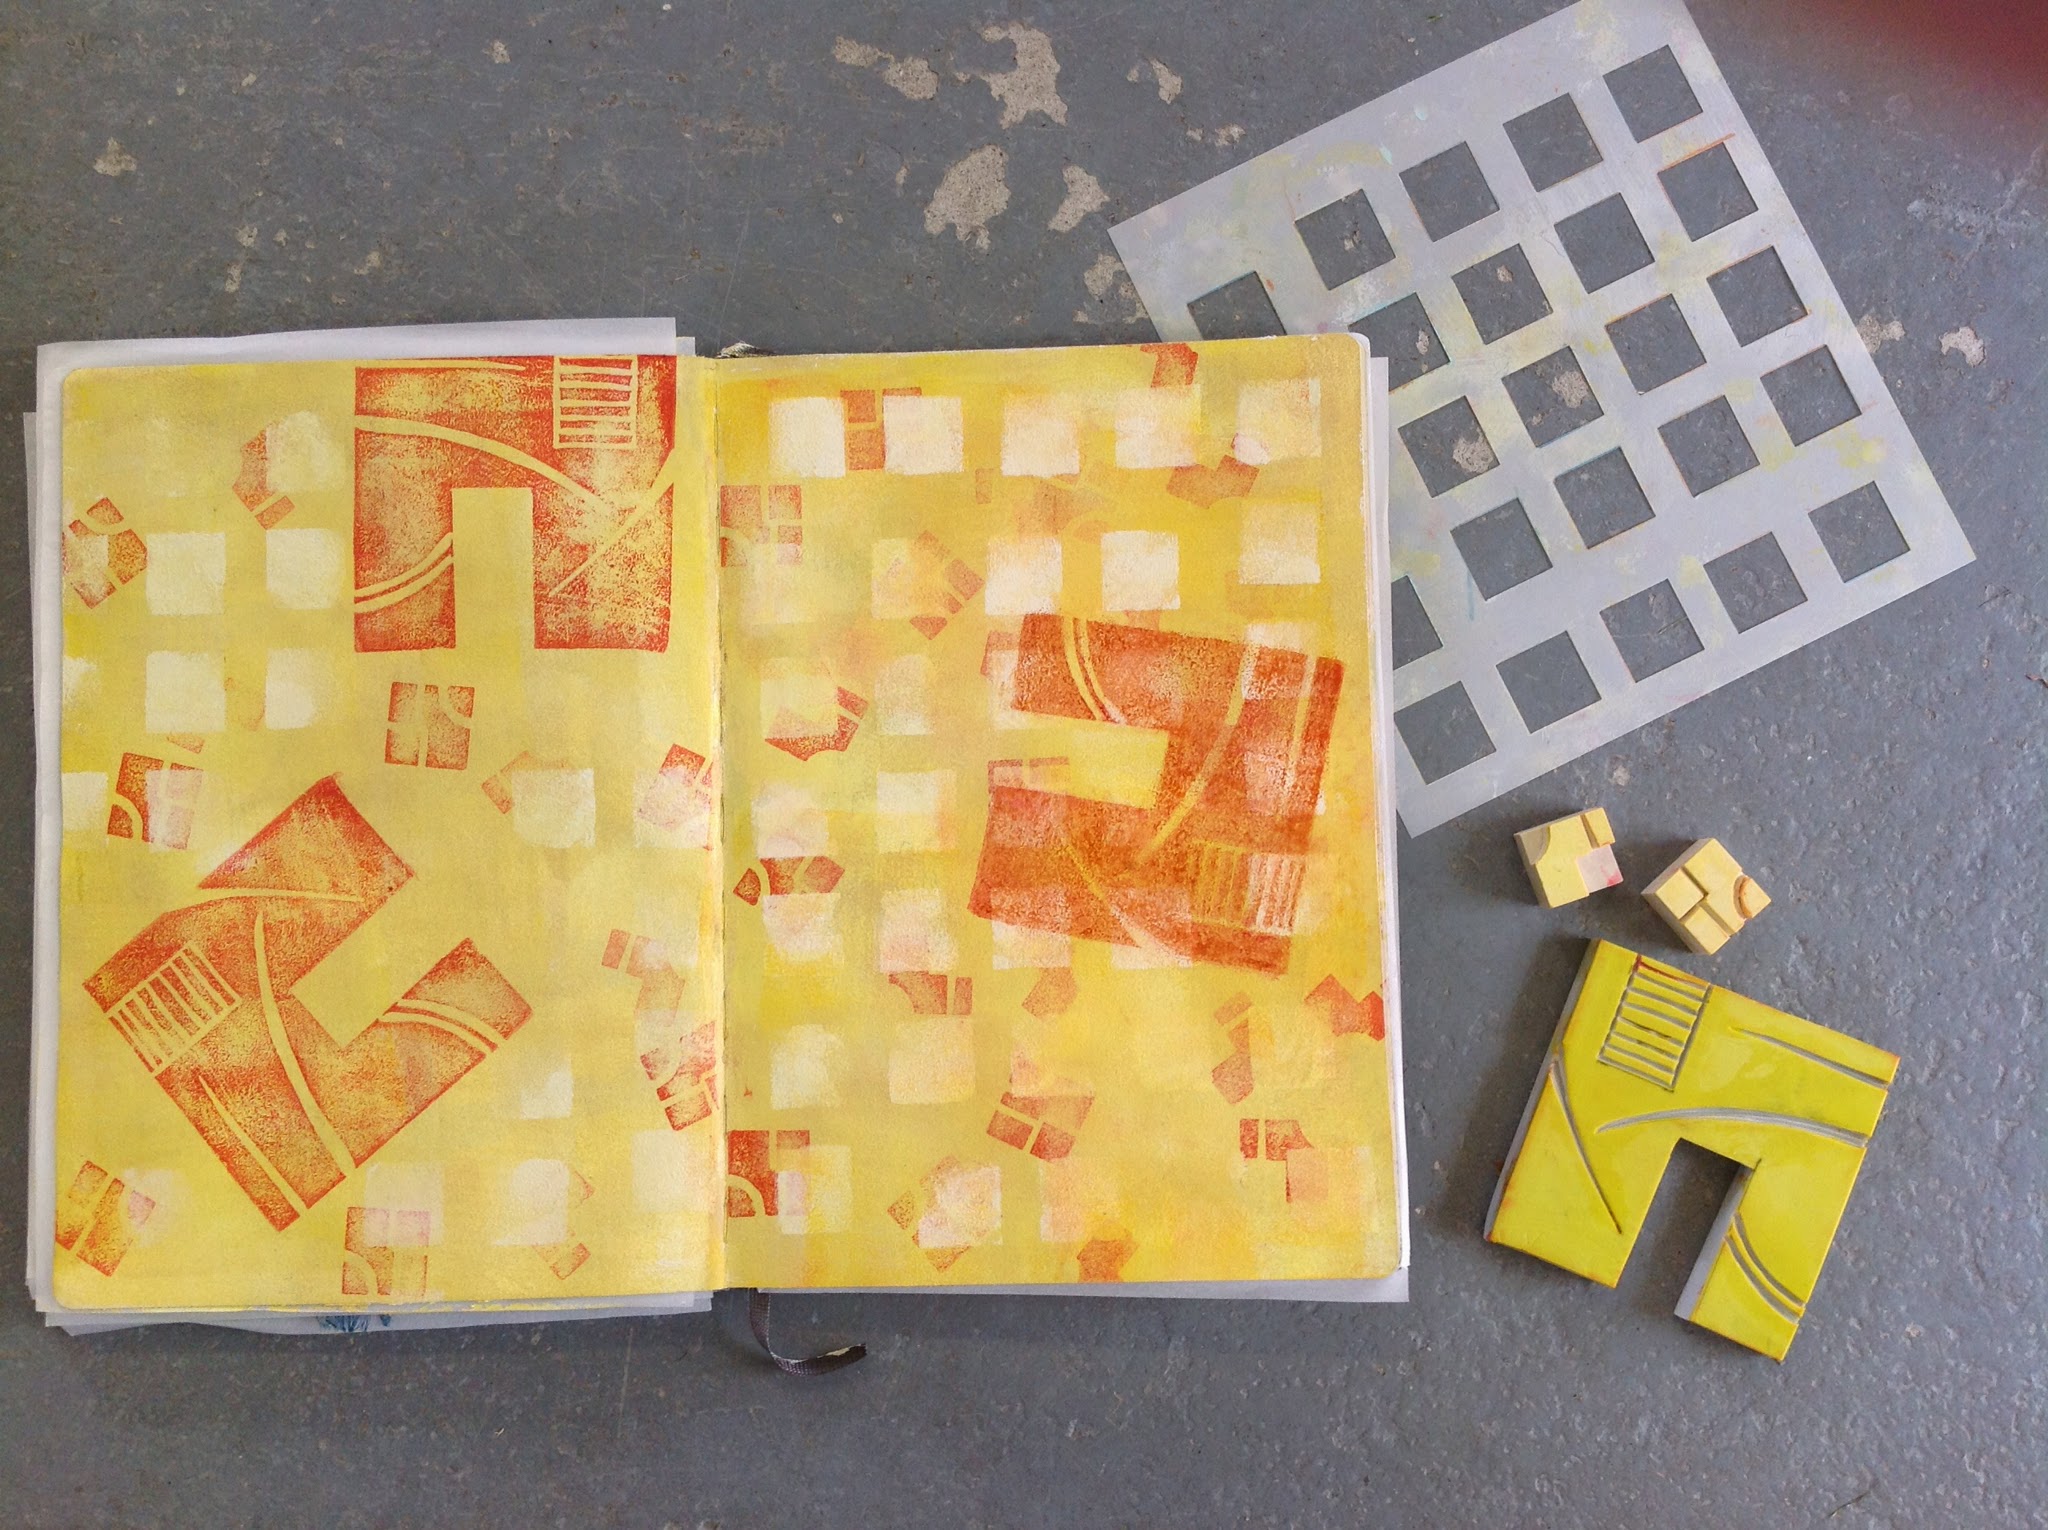
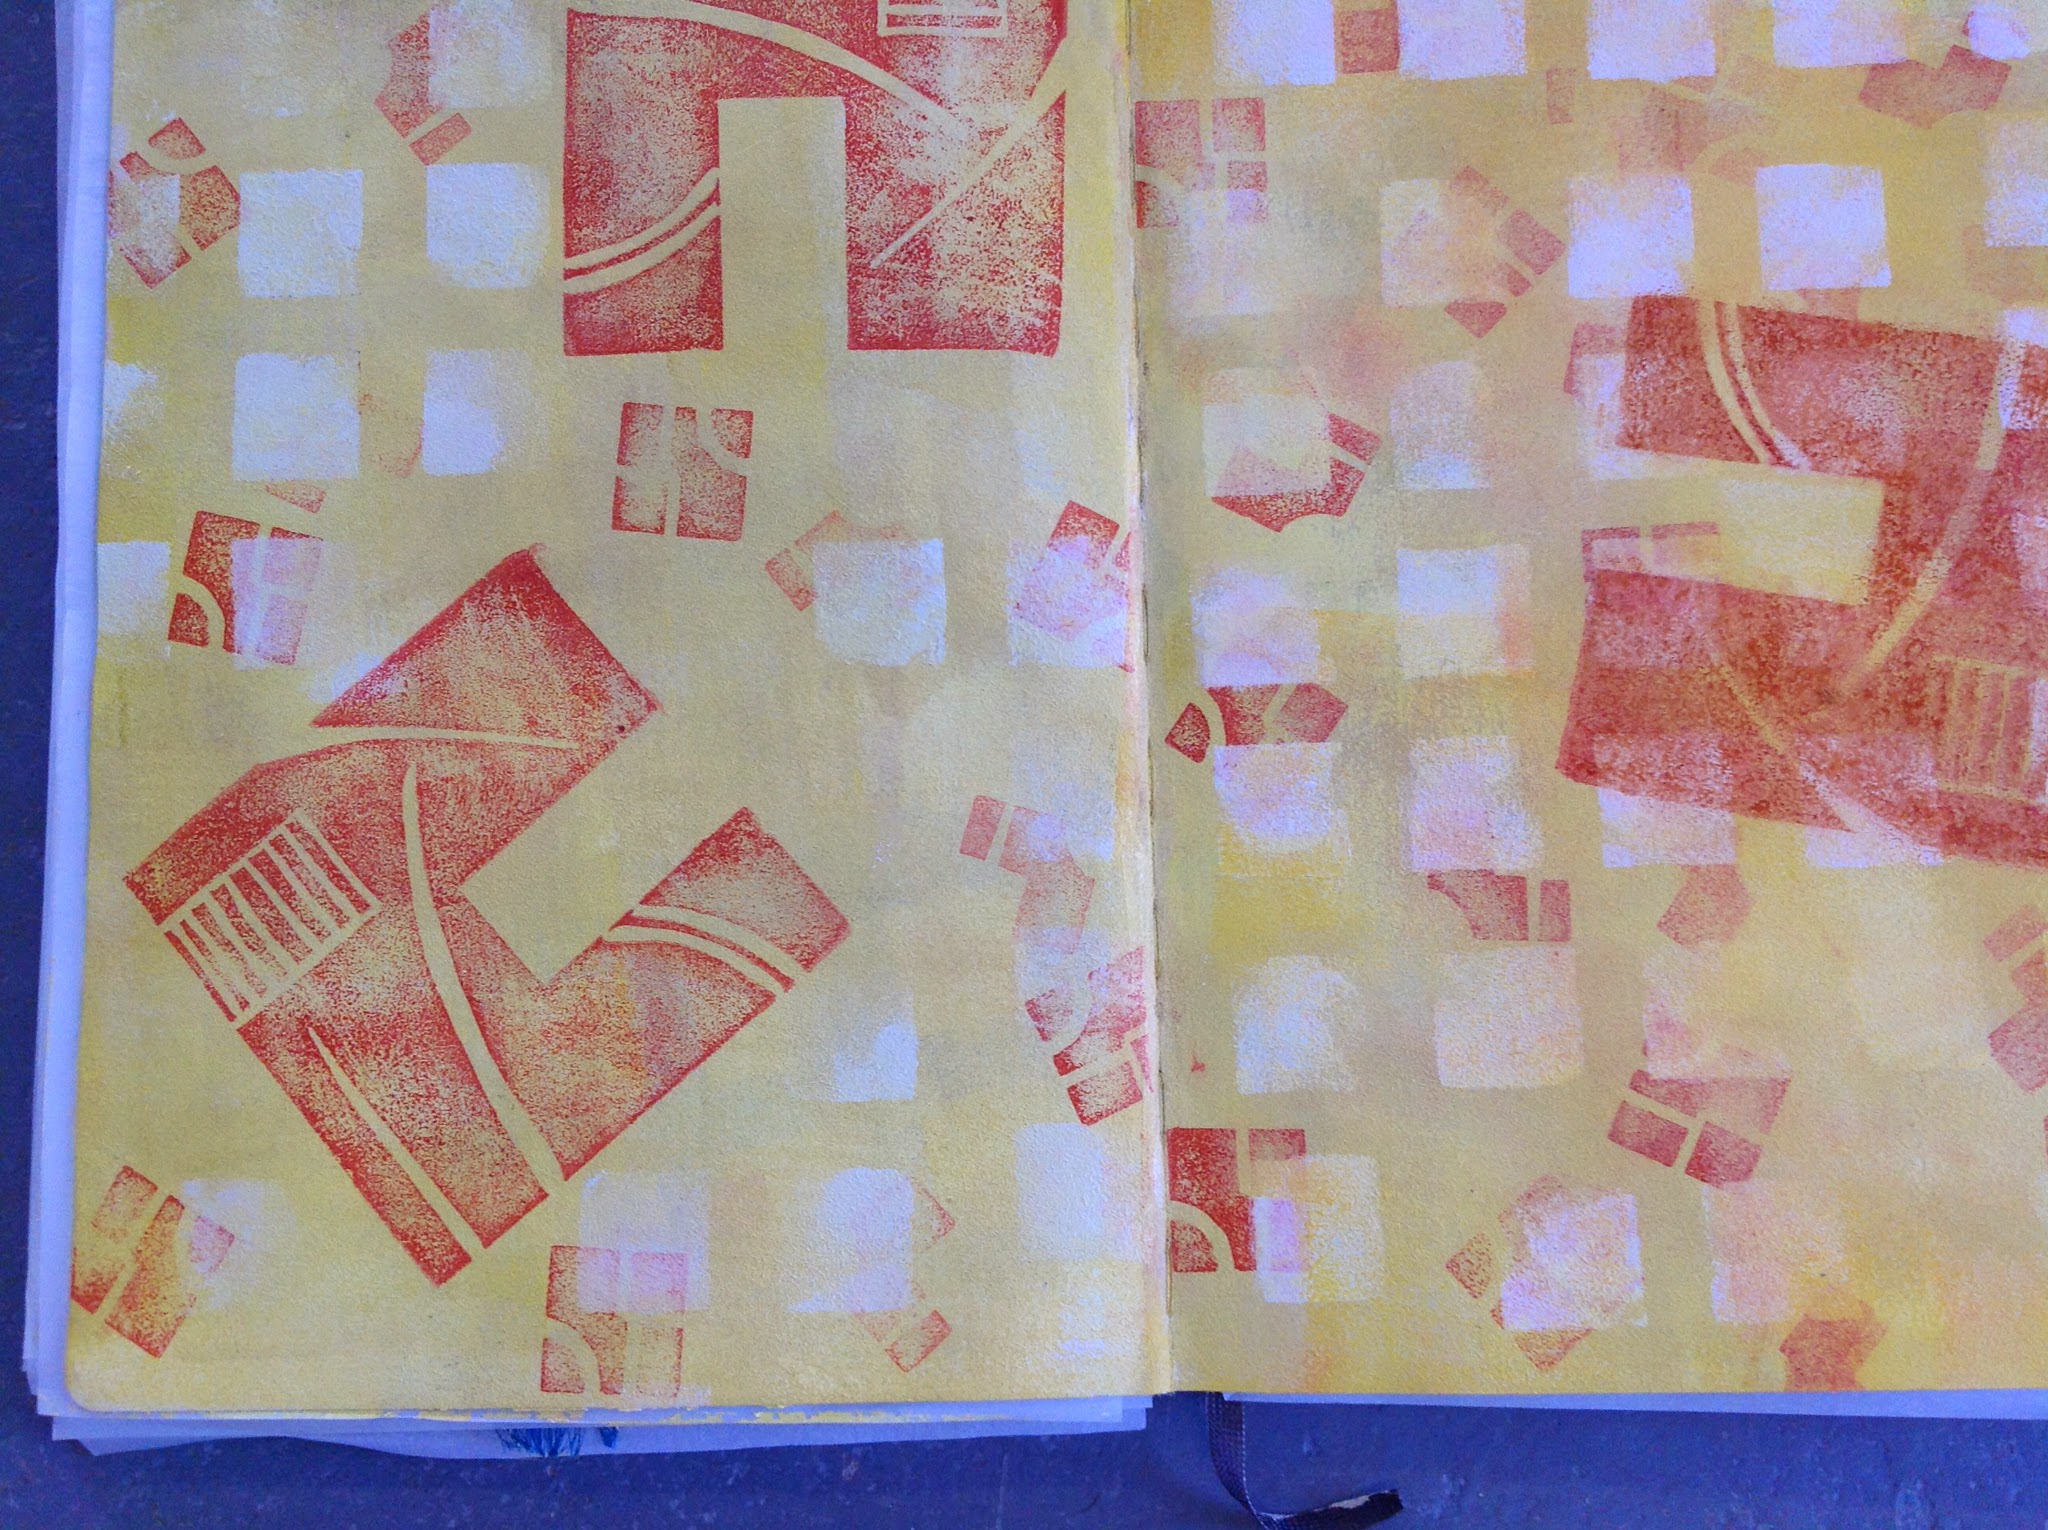
Stencil
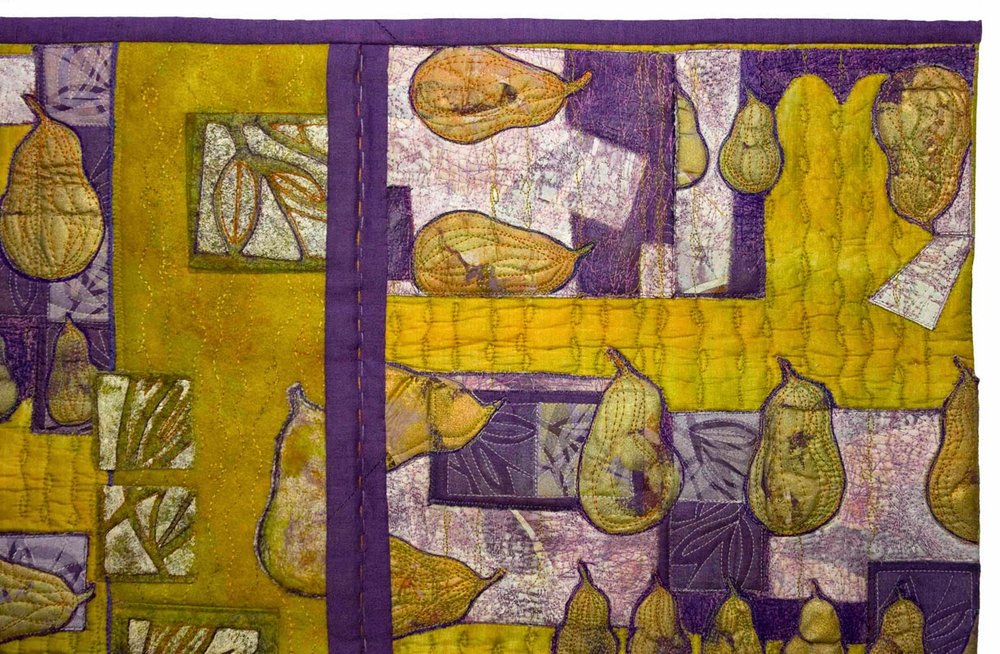
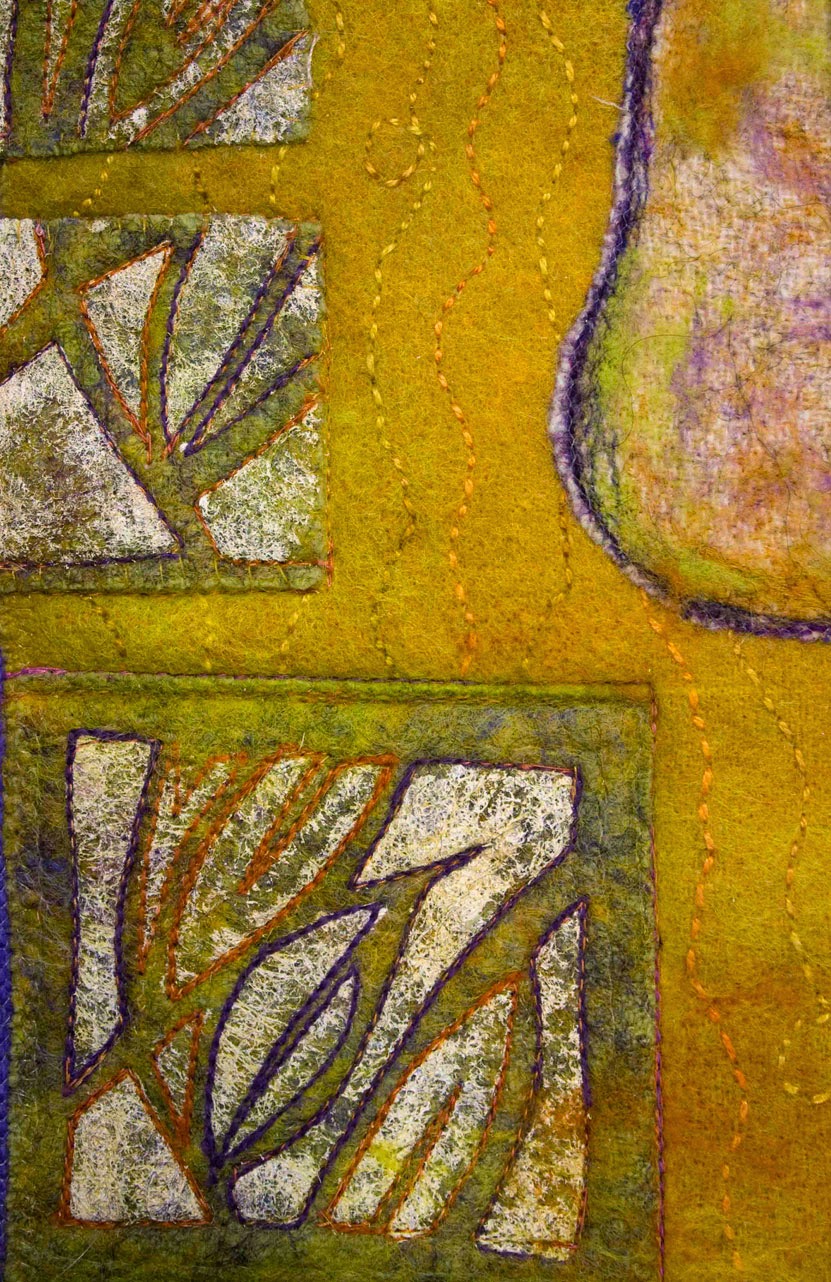
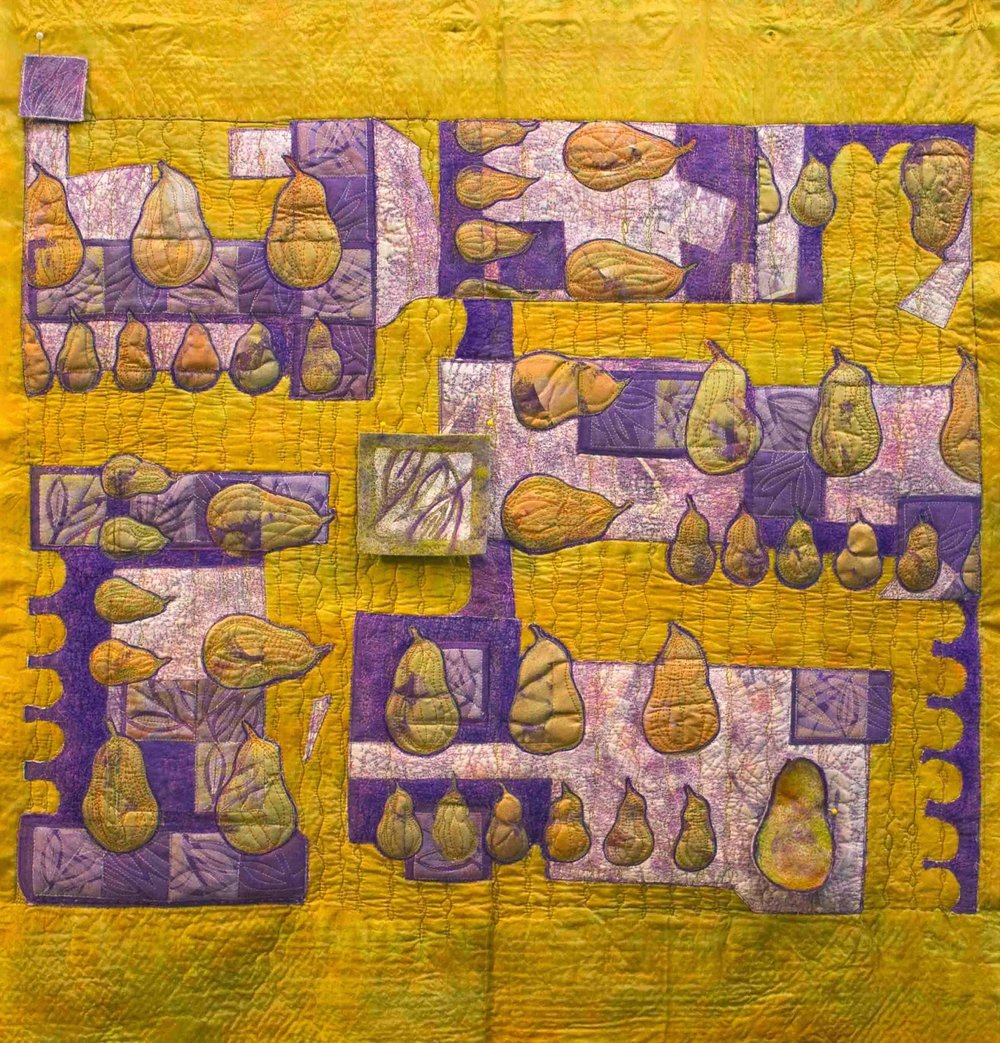
The news for my Etsy shop is that I am now offering my stencil and hand carved stamp designs as well as my fat quarter designs for sale. It is a big leap for me. But since the publication of my book I have been introduced to the whole world of crafts and crafters. Coming from a fine art background the world of crafting was so new to me. I have come to really appreciate it's value and the excitement and joy it holds for people! The lines between fine art and craft have blurred for me - the cracks and crevices filled! It is a delight!
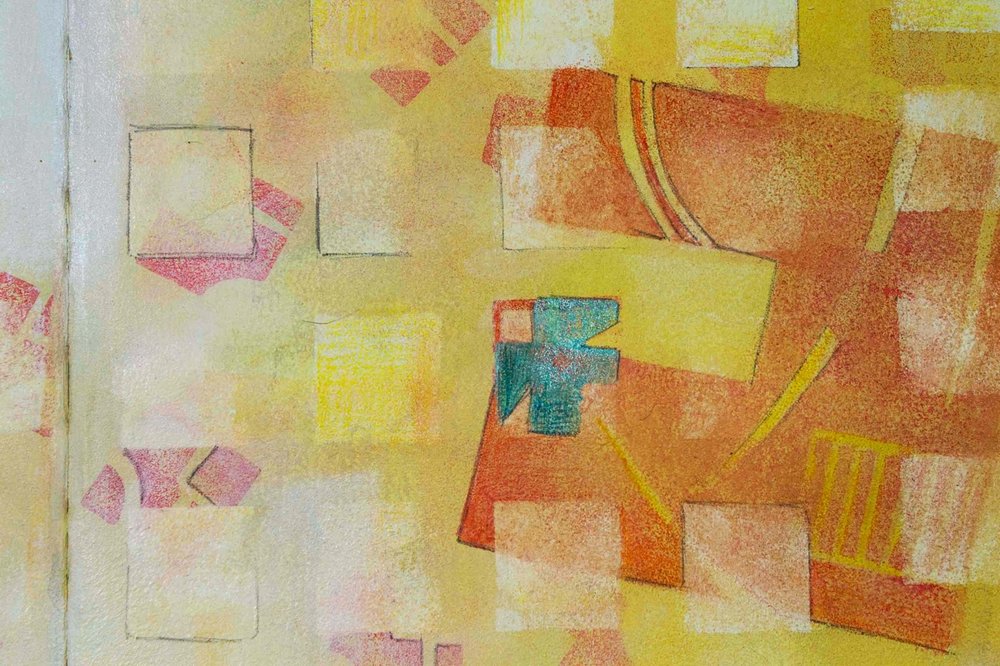
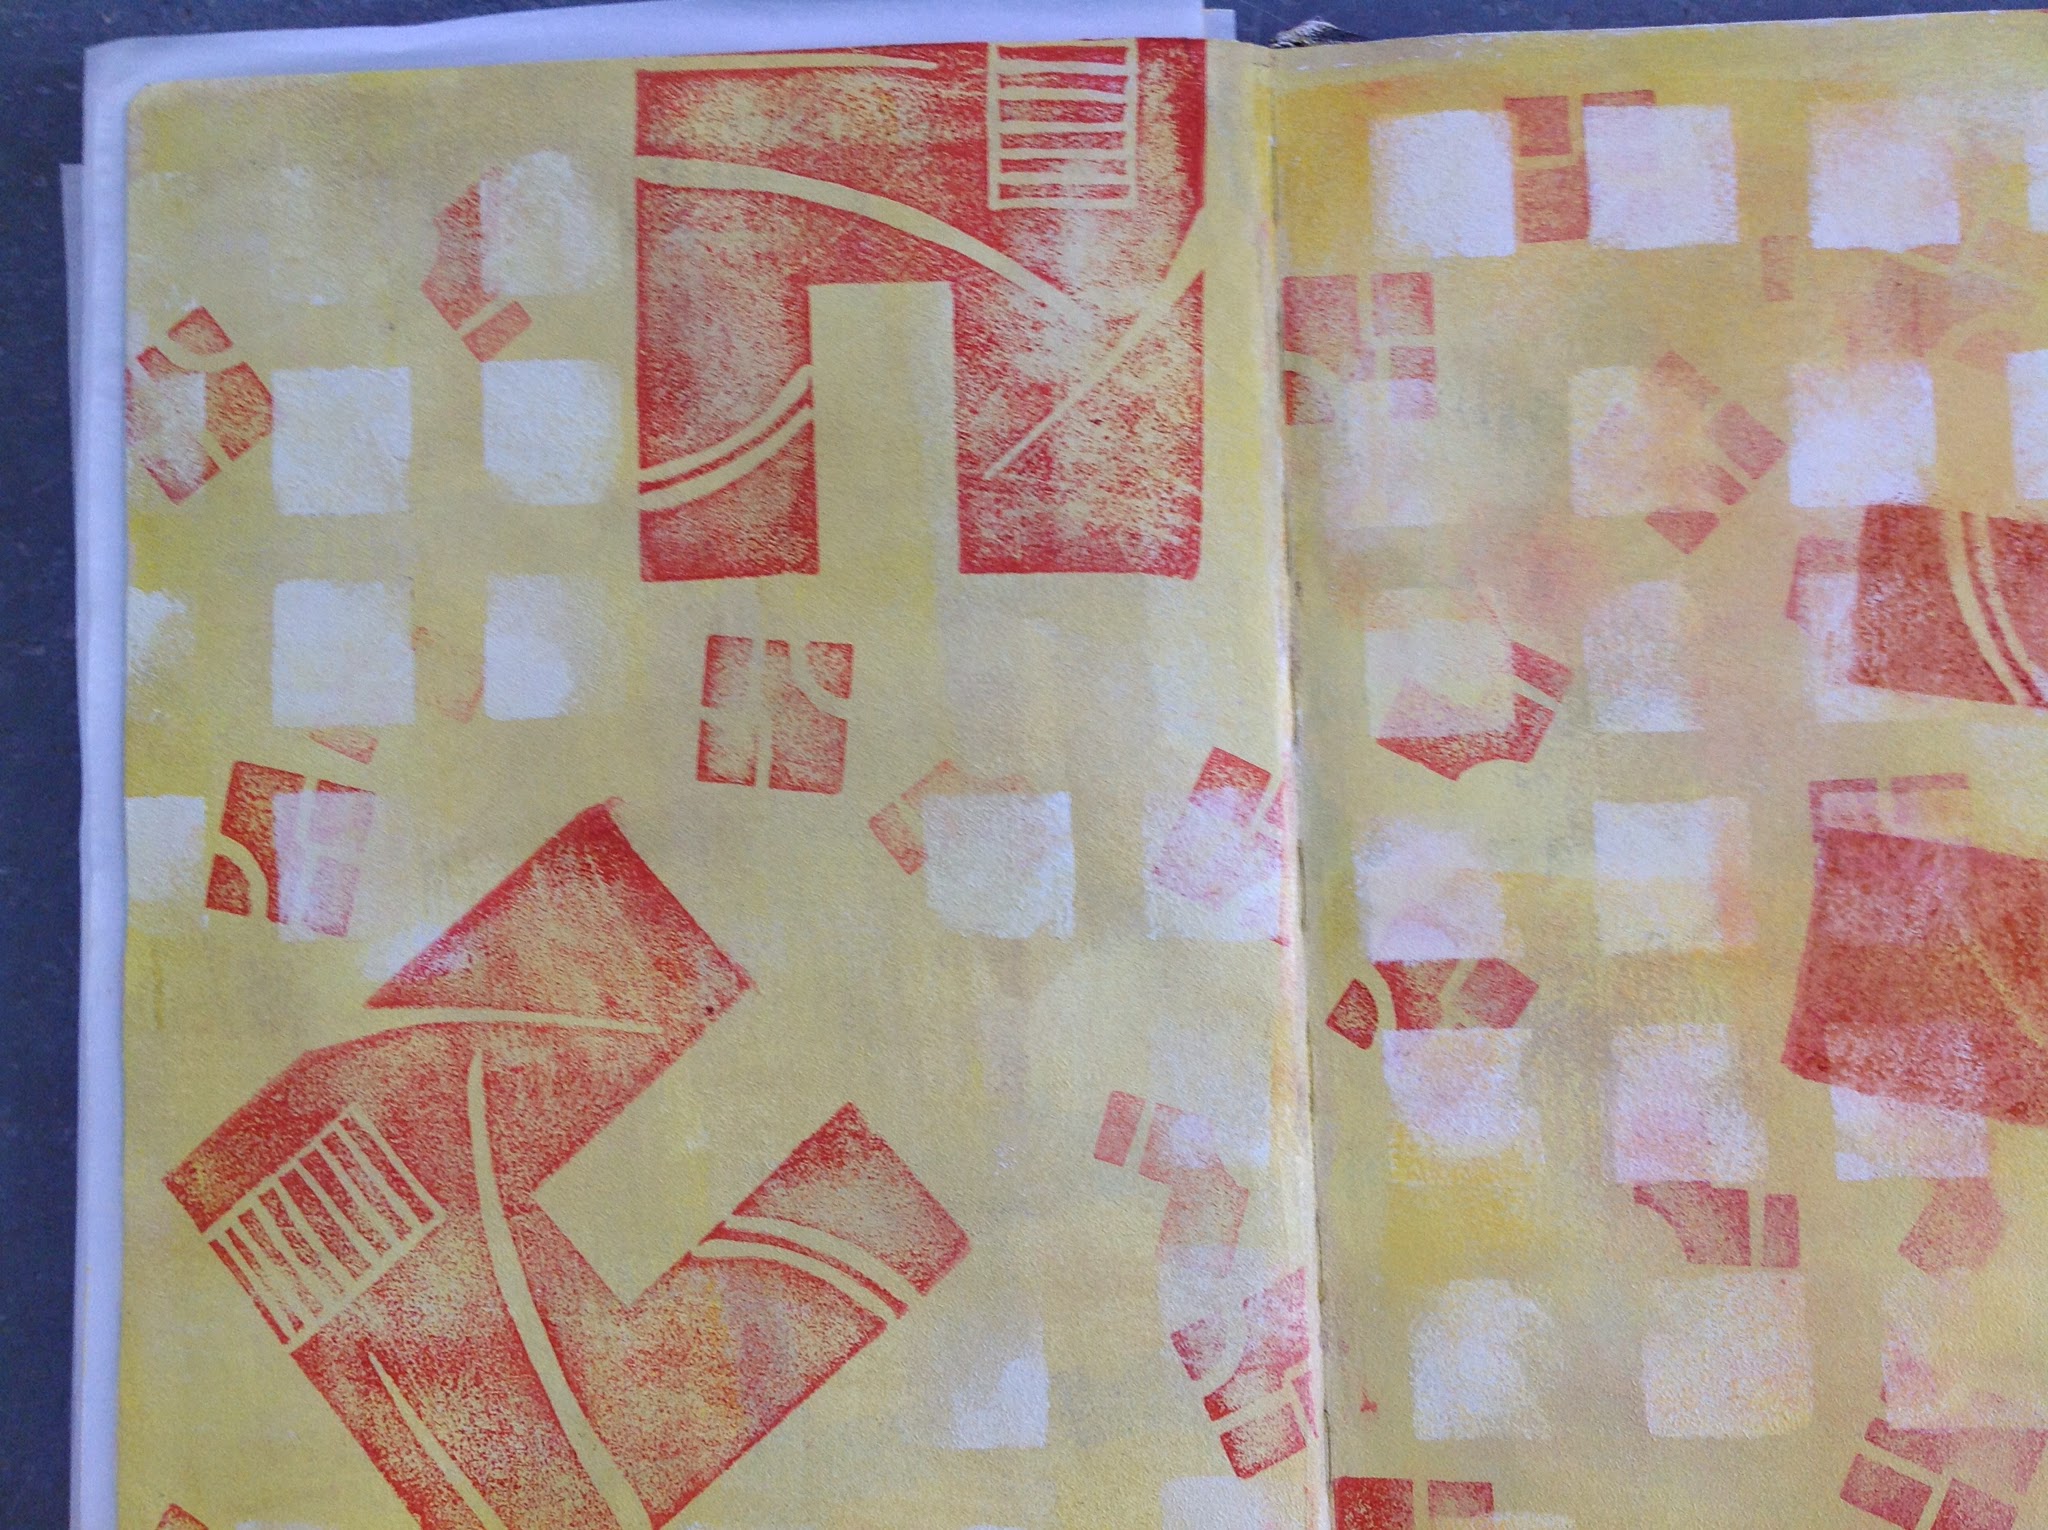

Stencil
Everyday I'll be adding new designs to my shop. The stencils are cut on my Cameo Silhouette machine. Many of them have companion designs and offer several sizes on one stencil so people can play with scale and rhythm on their pieces when they work. 
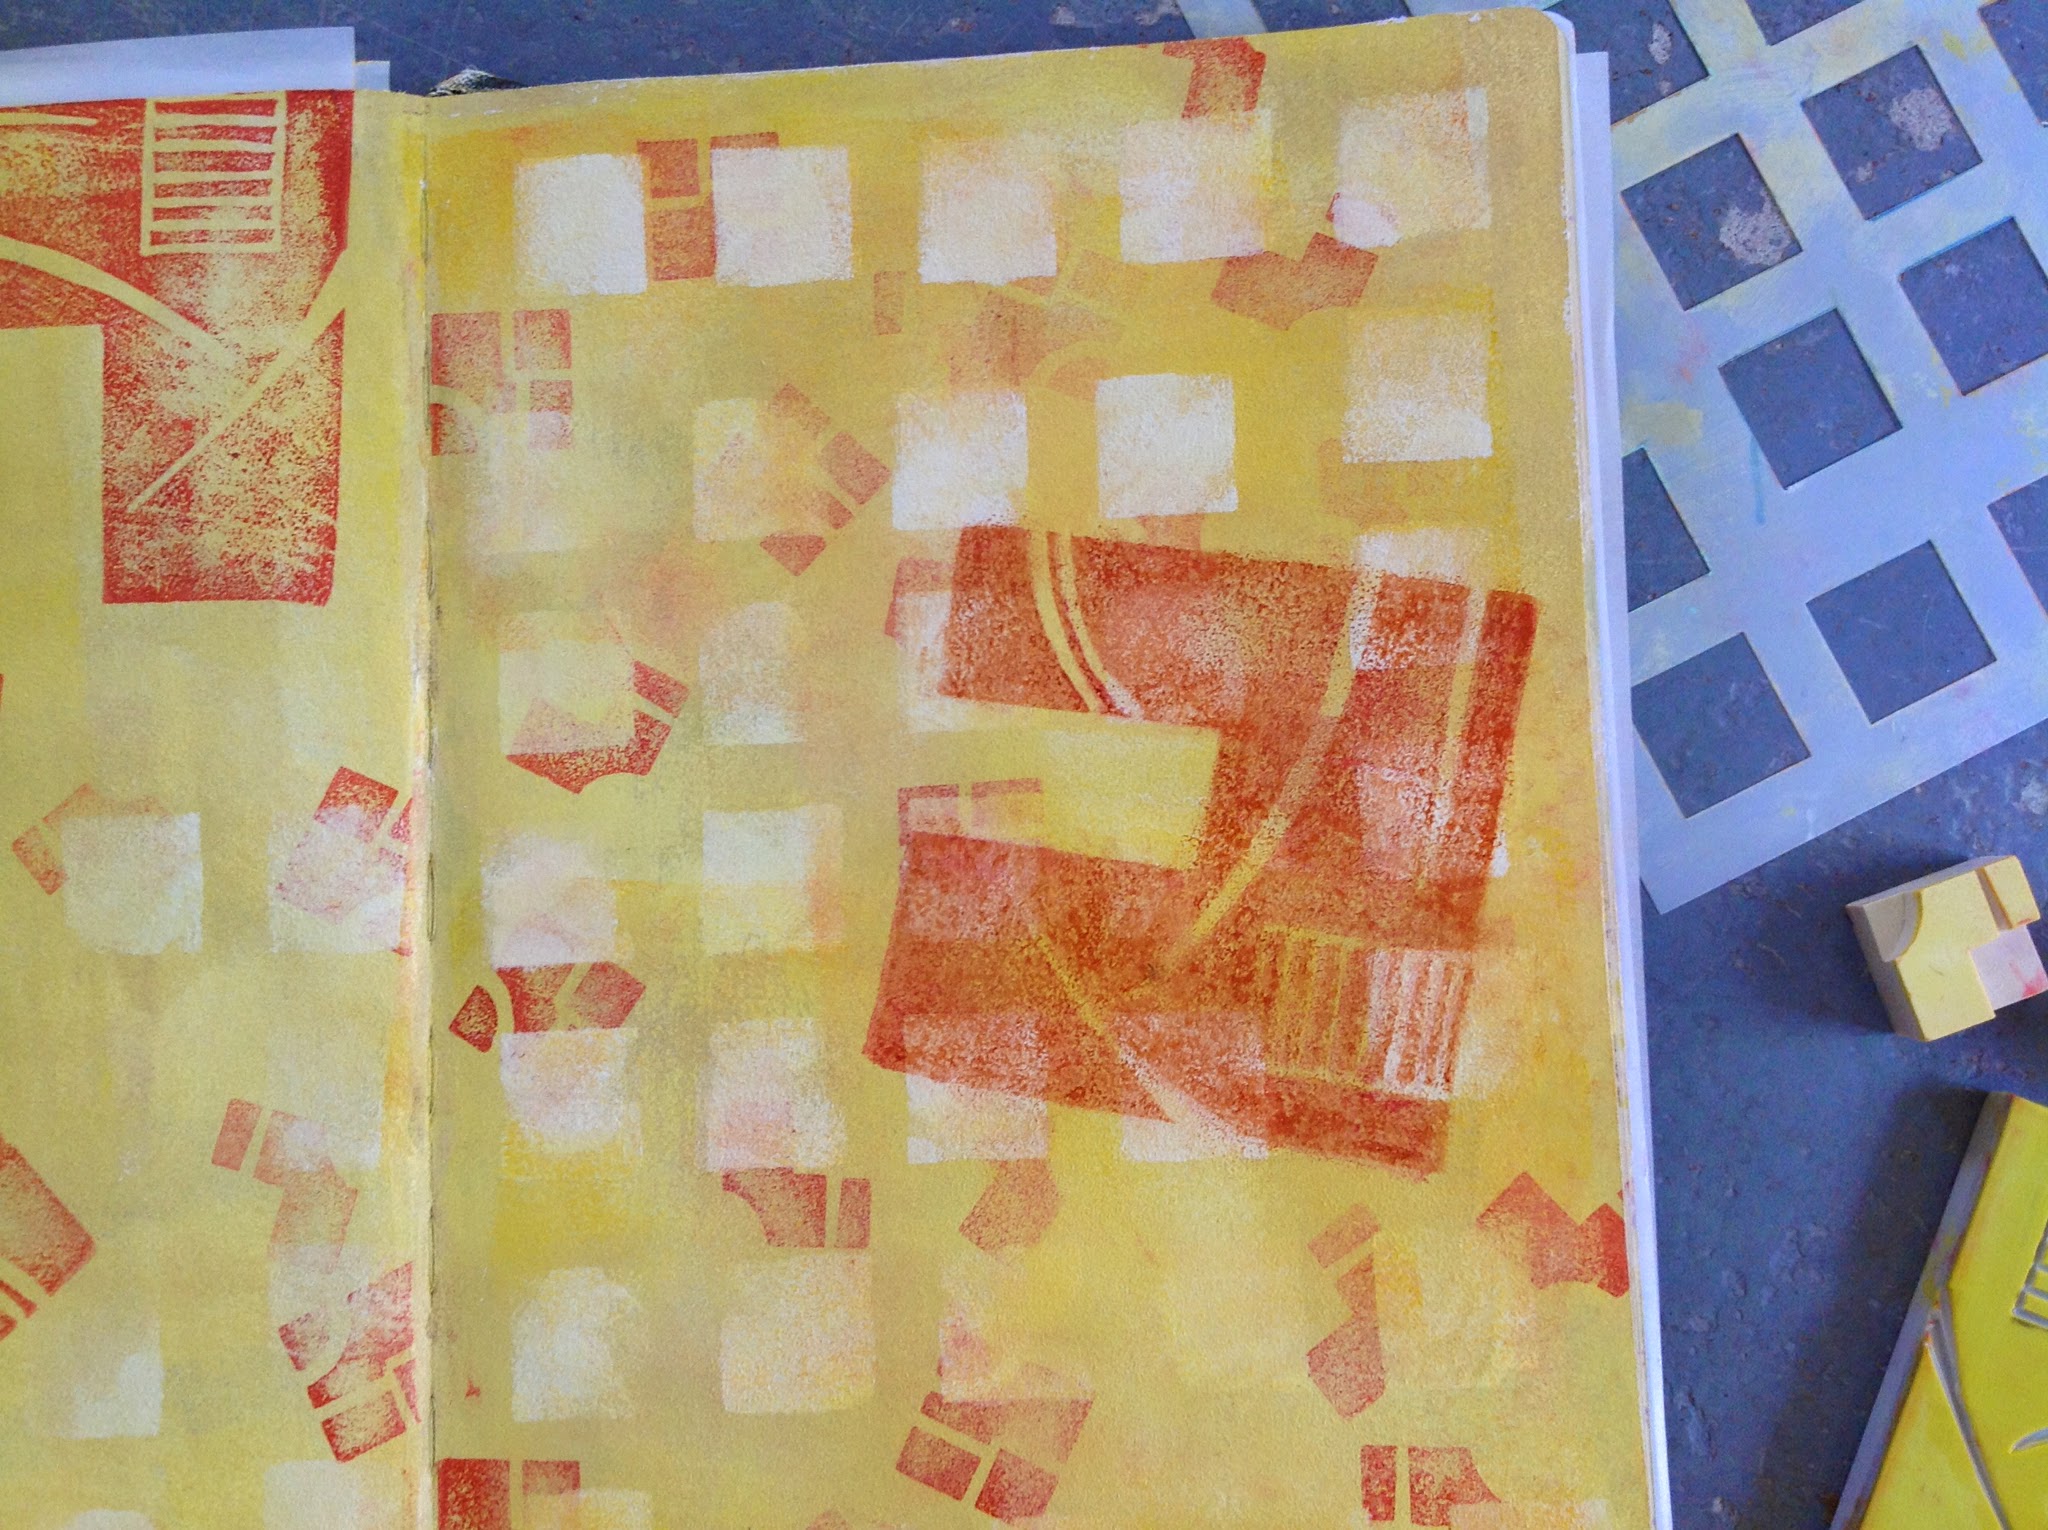
The fat quarters are digitally printed on fabric but for all my paper crafting friends I will be printing them on paper as well. The stamp designs (I don't have any of these up just yet) will be a digital download. I will be offering the fat quarter designs as a digital download as well.
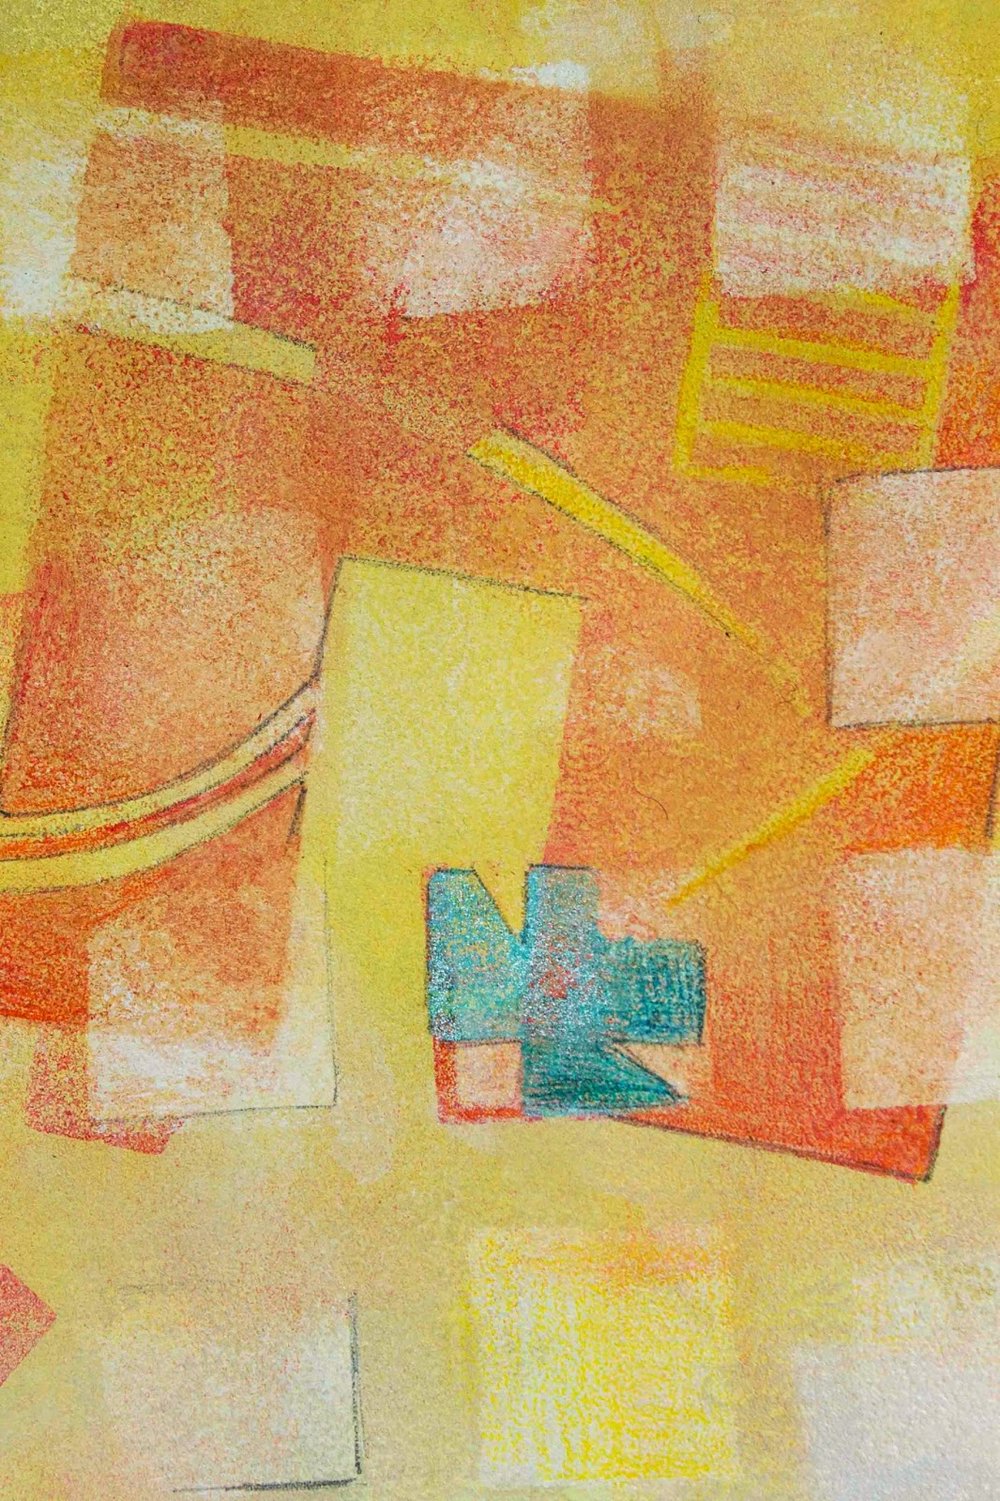
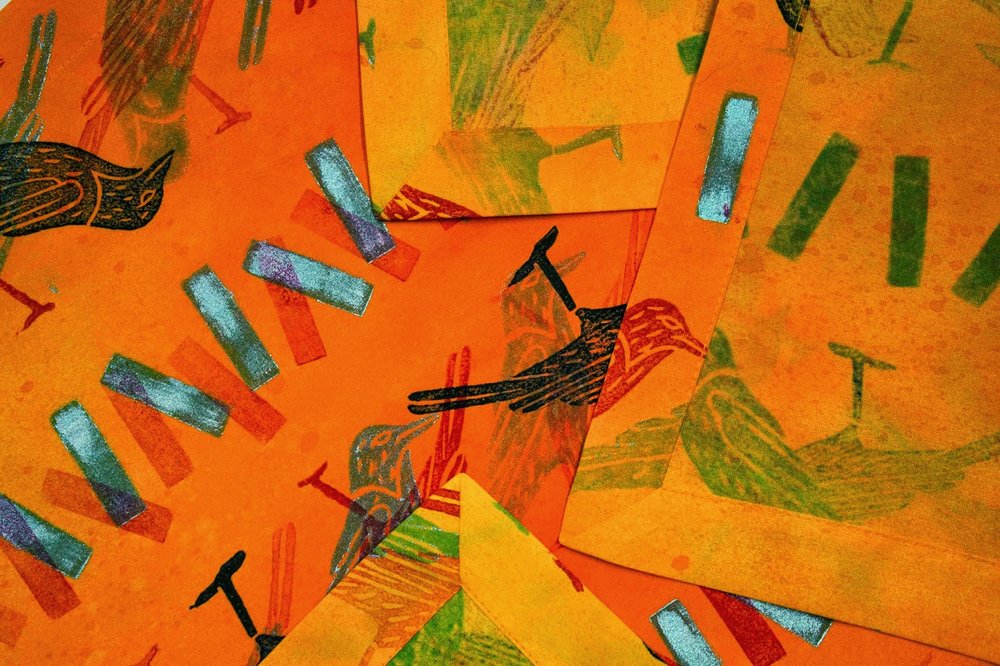
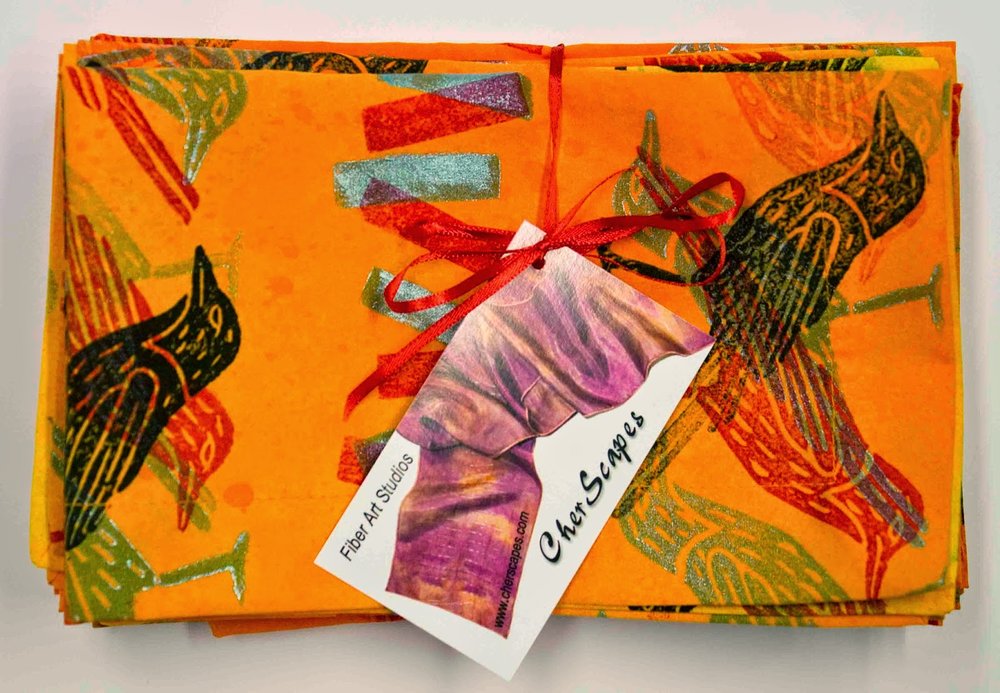
Fat Quarter

You can see the stencils here, fat quarters here, and digital downloads here. The selection isn't huge just yet but I'll be adding new items and designs everyday. And of course I will continue to add my
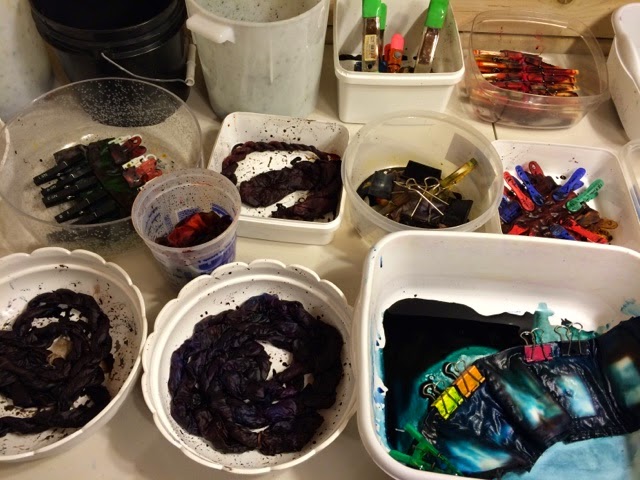
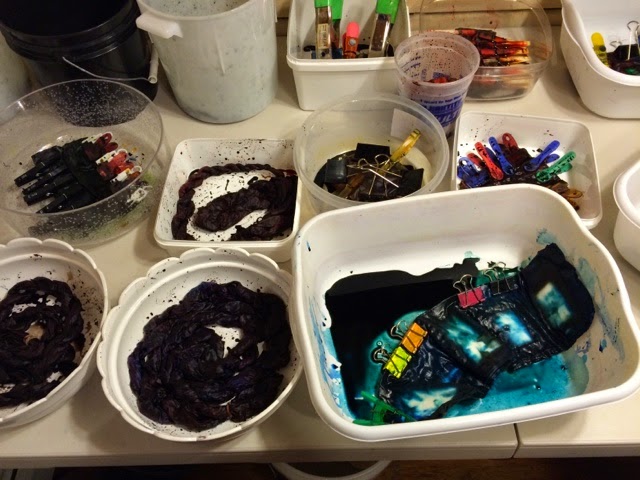
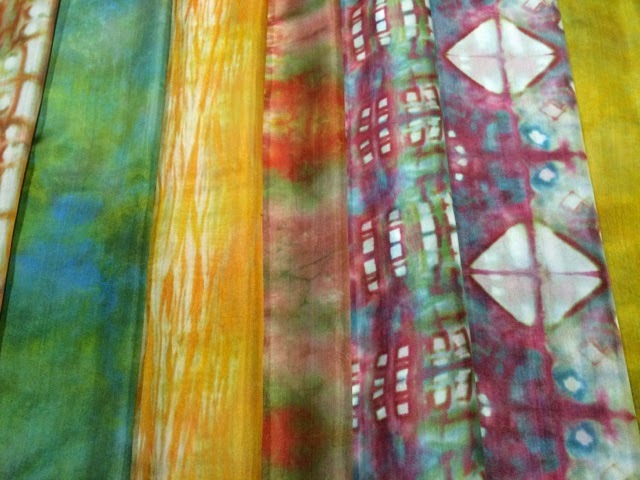
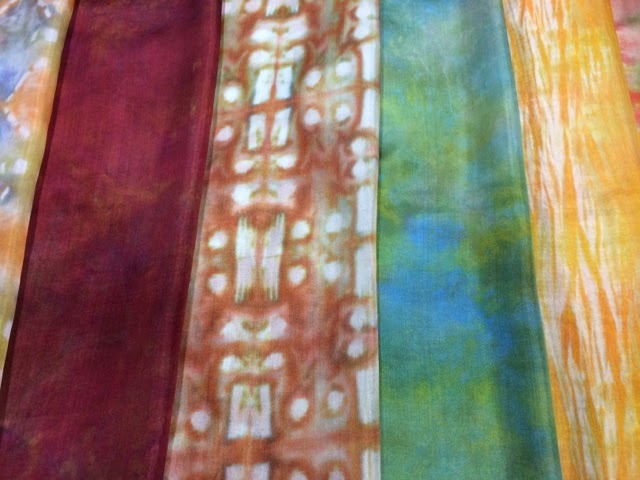
 hand dyed silk
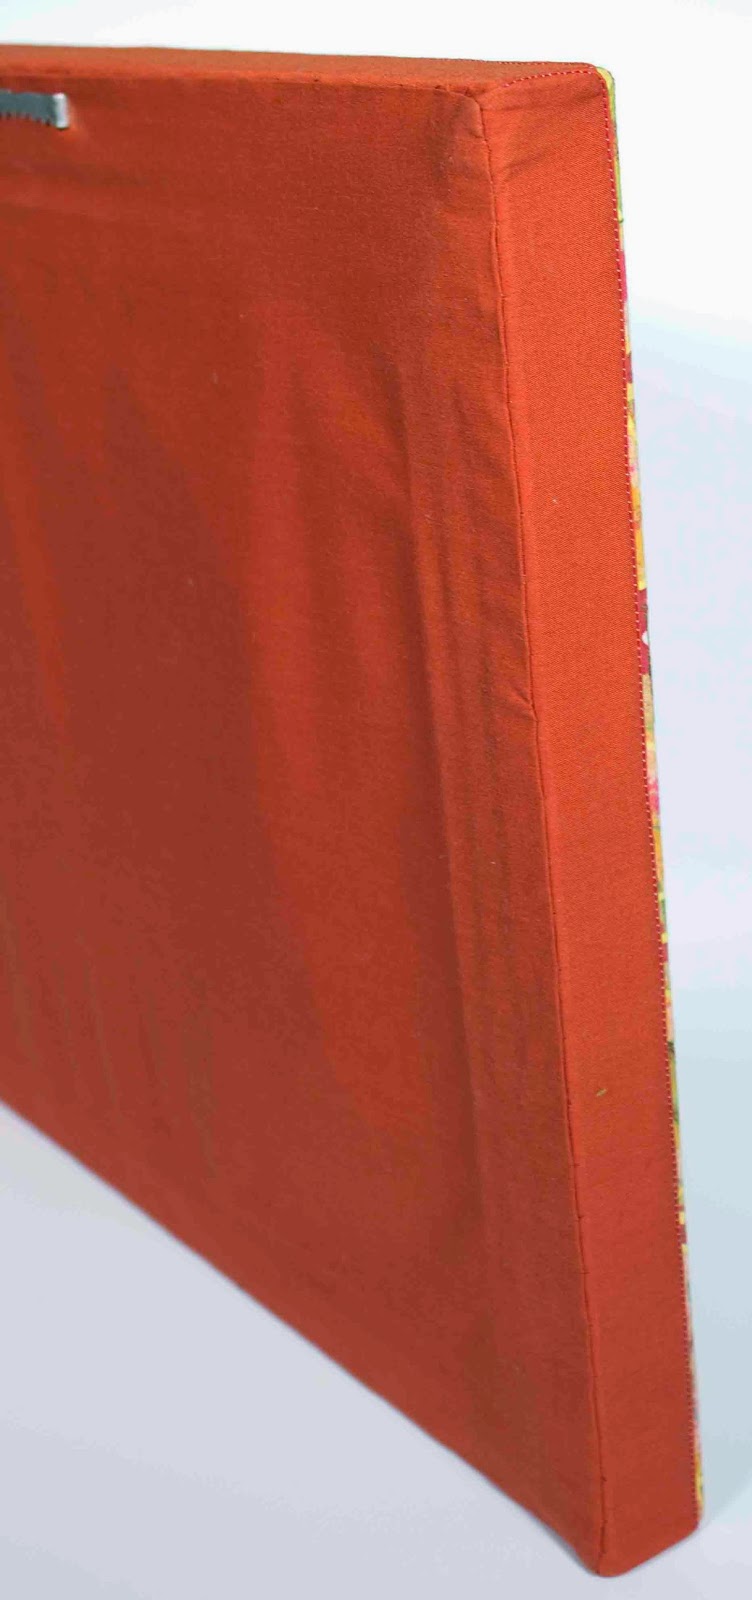
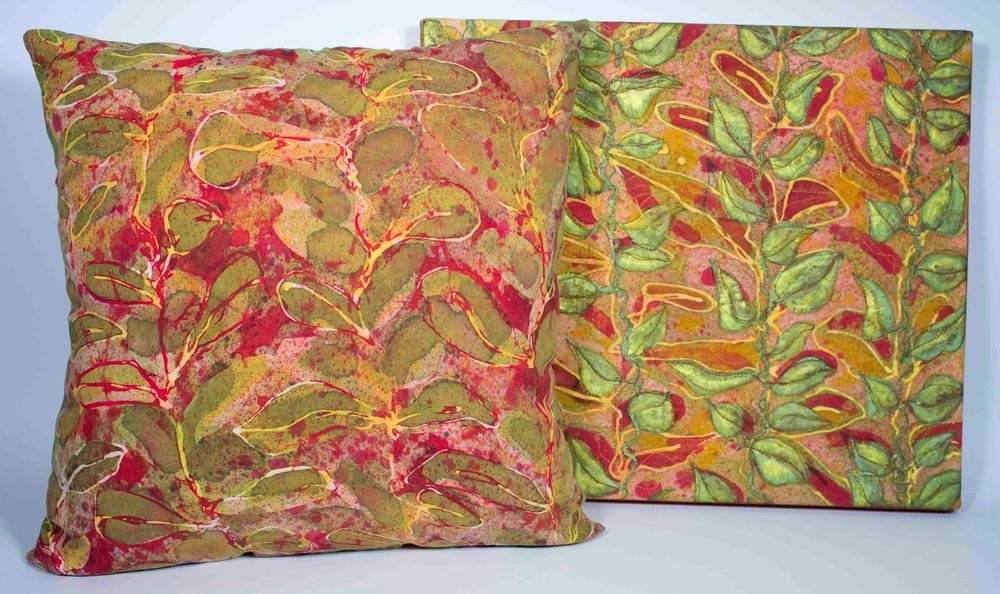
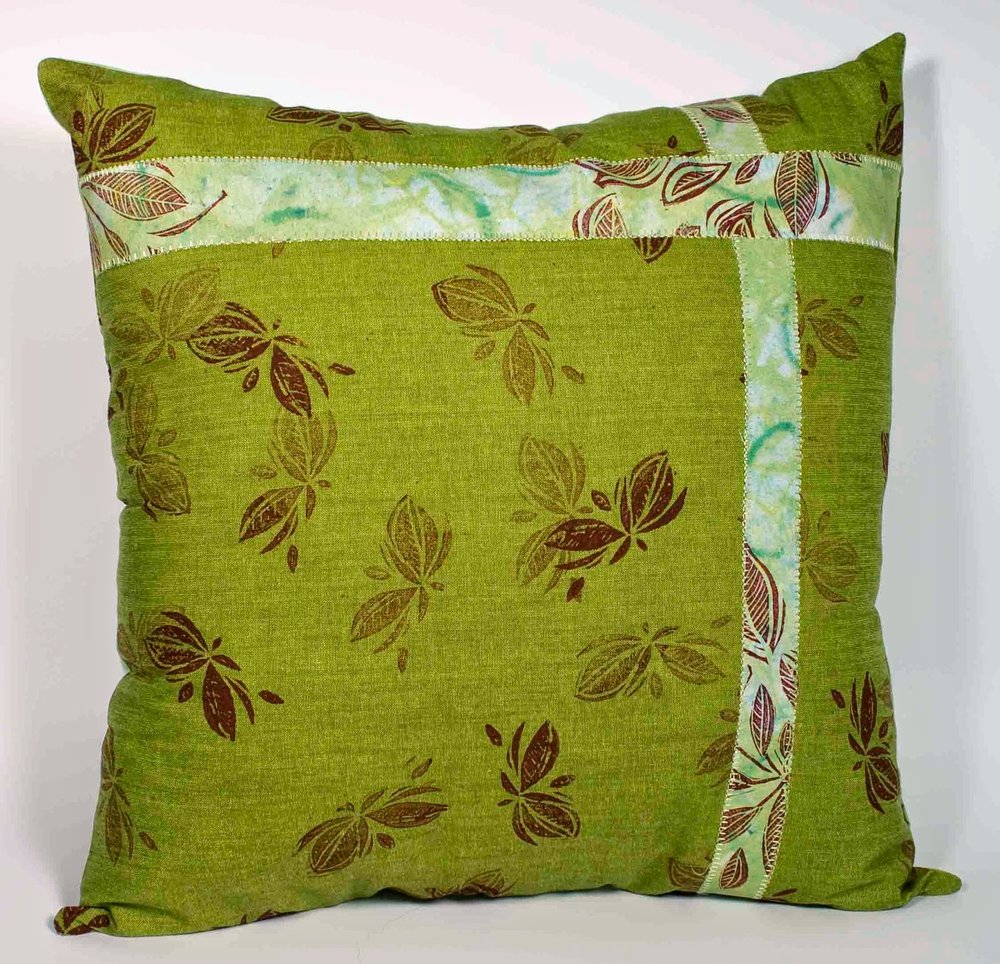
wearable art and my one-of-a-kind art pillows as well. I am now also offering pillows made from my digitally printed fabric. This particular home decor favorite will be less expensive then the one-of-a-kind versions.
My teaching schedule for 2015 is starting to come together. You can access the calendar here on my website. More classes and workshops will continue to be added as dates and venues are confirmed.

Don't forget you can click on the images for a larger view!

Happy New Year to all of you! May your lives be filled with love, laughter and all things creative!


Last Finished Art Quilt of 2014

Here it is. All done! I should have taken pictures along the way over the last month to show you. But sometimes I just get in the groove of working and find it hard to pull away to record what I am doing. I am introverted at heart. If you click here you can see an earlier version. There is not much left to what it once was. I cut it apart, reworked much of it with paint and stitch, added some wool and needle felting and feel really good about the end result.

The background gold fabric is a piece of my hand dyed silk. The wool for the center needle felted panel is from Weeks Dye Works, a wonderful company based in Garner, North Carolina that will soon have me listed as one of its designers. I am proud to use their beautiful hand, over dyed wool fabric fat quarters and pearl cotton embroidery floss.

The quilt now measures approximately 36" square. Not very large - I know. But I am loving it just the same.

Click on the images for a larger view.

Finished piece titled "Fertility".


Needle felted panel.


Detail of needle felted area.

Detail of needle felted area.

Fertility


For materials I used my CherScapes Pear Stencil and one of my CherScapes abstracted leaf stamps, Jacquard brand textile paints, variegated cotton thread from Superior Threads called King Tut, Golden fluid acrylics, Norwegian C-1 wool in several colors, Weeks Dye Works wool fat quarter and pearl cotton embroidery floss and Genziana Wool Thread. I also used my own hand dyed silk and batiked cotton, although none of the cotton is still visible!

For techniques I used direct painting, stamping, machine stitching, both hand and machine needle felting, free motion quilting and hand embroidery. Phew!

I'm linking this post to Nina Marie's Off the Wall Friday. Have a peek at what some other fiber artists have been up to.


Around the World Blog Hop

I was invited to join this blog hop by Jeanne Marklin. She and I met several years back when I had a large studio in Downtown Greenfield, MA. Jeanne introduced me to the organization called the Studio of Art Quilts Associates, which was a really great foray for me into the world of art quilters. I had been making art quilts for awhile but didn't realize they had a name!

Anyway, Jeanne has been a great friend for me. She is an exceptional artist and is a master at dying cloth. You can read her blog here, and visit her web site here.

One of the goals for this blog hop is for artists to talk about their art making process. That is a hard one for me to write about. Only because I don't really know where I begin. I have been making art since I was a very small child and have been lucky that over all these years I never really lacked for inspiration or drive. I feel that I just can't help myself.

Like many artists inspiration is all around me. Sure, it can come from a beautiful sunset and the glorious autumn leaves here in New England. But it also comes from a single twig on the path through my woods, the call of a lone seagull and a random song on the radio. It comes from the ticking of my studio clock late into the dark night, from the color grey, from the fabric I just dyed and the stencils I cut the other day. It comes from the work of other artist be they painter, quilter, song writer or poet.

With my mind and heart heavy with vision and thought I go to the studio and simply work. I make things.

Over the last decade or so I have been making things with fabric - fiber. I am a painter. I am a sewist, a dyer of cloth. I am a collage artist - I make things, then cut them up and put them back together again.

It is a strange and intriguing process. And I  know not where it comes from.

Below is what I am working on right now. You definitely need to click on the image for a larger view. As you see it here the piece will measure about 28" x 32".

The process of creating this piece is almost complete. It is at this stage that I can finally see it finished in my mind's eye. However, if I am not careful and become too dedicated to this final vision I might miss something along the way.

Recently I have begun adding needle felting to my art quilts. Through texture and the nuance of tiny bits of wool fiber, I add another dimension to the surface of the piece. The blank spaces on the top and bottom will be filled in with small squares of needle felted imagery.


Add caption

This shows one of the needle felted areas.

Here it is again. There will be more of these with similar imagery.

Needle felted pear. I love how it looks like a pastel drawing!
I have invited Wen Redmond to participate in this blog hop. I met Wen when I was writing my book Fabric Surface Design. I was intrigued with her process and loved her imagery.
Her blog is here. Her website is here.


Page Review

Sometimes it happens that I think a page in my art journal is finished. I may be so sure that I will even put a completion date on it. But often, when I flip back through the journal I see a page entry with fresh eyes.

That is what happened with this entry from August of this year.


It seemed very graphic and "urban" to me. So I really liked it for those reasons. But I also didn't like it for the very same reasons! Man, can't a girl get it right?!?!

Fast forward to today and this is what I have now.

The two page spread


After a little bit of white paint and some pencil drawing this is the real finished spread. It still looks graphic and "urban" (whatever that really means!). But it feels more like me.

Don't forget to click on the images for a larger view.


Stenciling

The decision is out - I am madly in love with my Cameo Silhouette machine! Did I say this before?
I think I might have but I just can't help myself.

I love the use of scale in my work. I often talk about it in my classes. Sometimes all a piece needs to finish it off is a few more prints ( such as stencils or stamps) of an image you have already used but in a different scale. You can easily accomplish this by enlarging or reducing your image/design on your home copy machine/printer or on your computer with editing software. I use photoshop but there are so many others you can use! The Silhouette allows me to have multiple sizes of one design with little effort.

Cutting stencils by hand has become increasingly more and more difficult as the years pass on. Those middle aged finger joints just aren't happy any more griping that exacto knife and pressing hard to cut through the stencil plastic. So I always put off cutting them out.

As a result, I have had a growing pile of stencil designs for a while now. So it has been such a treat to see them come alive. Here are a few examples.


One of the things I am thrilled about is that I can still create the designs by hand, you know, the old fashioned way by drawing on a piece of paper. I really didn't want to have to design on the computer. I want a hand drawn look to the stencils, plus I want to be able to sketch out designs while I am watching TV with my family, while I am outside and while sitting at my drawing table. And I love the feel of that pencil in my hand. Know what I mean?

Here is how it all works. Basically I sketch out the design. This is actually quite a challenge for me. My drawing style and use of line has to do with subtly and gradations. Stencils are all about black and white! No greys! Once I have the idea sketched, I put it on my little light table to trace out the outlines n a new sheet of paper. Then I fill the shapes in with a black marker. I like the brush tip of Pitt Pens best for this.

Then comes the computer. I scan in the black and white design, smooth out the edges and joints in photoshop, then load it into the silhouette for cutting. This is a good example of the progression.

sketch in pencil

The traced outlines with a pitt pen.

The shapes filled in with a Pitt pen and refined in photoshop.

The cut stencils.


Within the silhouette software I can easily resize the image, as well as create a mirror image.

That is all for now. A friend of mine has suggested I put together some tutorials of the many things I do. It is a great idea and the natural next step for me as a teacher. So stay tuned!

Don't forget to click on the images for a larger view.


Fun Foam Goes Retro!

I posted this today on my Art Journal blog but thought I would post it here as well. I am having trouble getting that one off the ground. So maybe if you like this you might head on over there and take a peek. :)     Art Journal Blog

So this isn't really from my art journal. But it could have been!

One day I was fooling around with my stamps getting ready for a week long workshop I was about to teach. Before a new workshop I always like to bring something new that I have created, even if it is a workshop I have taught many times.

I have had these stamps for a few years now. I made them out of Craft Foam or sometimes known as Fun Foam, but never really used them. I always thought they were kind of weird. When I made them I was trying to see if one could cut the foam with scissors in a kind of free form method. That part worked out just fine. But I never really liked them. Never even used them!

So I took them out when I was packing up. I had just packed my stamping sketch book, but I hauled it out of the box and grabbed a couple of Ancient Page stamp pads. I love what happened. Sometimes the best things come about when you aren't really taking yourself very seriously.

Anyway they look very retro to me. I can't wait to use them as a new fat quarter design!


 These are the stamps. They are so uninspiring, don't you think?
But now I love them!

The little blue grid stamp was actually one of my students. She was stamping blue ink to try it out and I saw that it was just the thing I needed! She very graciously let me use it!

Art Pillows

I have begun to offer pillows in my Etsy shop.

Because they are one of a kind and because they utilize my hand painted and dyed fabric, I am referring to them as art pillows. Just the thought of that makes me giggle.

Many/most of the pillows will be made from samples I have created for my classes. It is true that I could just keep them as samples so I wouldn't have to be always making new ones. But I hate dragging around the same samples from one year to the next. For my own excitement, I need to create new samples. An added bonus is that the process of making the samples reconnects me to the technique and helps me formulate the workshop in a new way.

I take pictures of the old samples so I can precent a slide show of samples on my ipad to my students, but the actual physical samples are new and exciting to me. Plus it keeps me pushing my mediums and helps me grow. So I thought making pillows out of the old samples would be a good use, rather then just keeping them in a box on my shelf.

Sometimes I add a bit of embellishment. Sometimes there might be a collection of a certain pattern or print, but they will remain one of a kind.

Here is one I have had for a while now. It is made with one of my batik samples. I had laid out several pieces of fabric to work on at the same time (this is a practice of creating I now do all the time). So I had enough fabric to cover both the front and the back of the pillow, as well as another piece of the batiked fabric I turned into a small and decorative wall hanging/art quilt.


Detail
This is the wall hanging. It measures 16" wide by 14" high.


Detail 
Side view

Covered back with a saw tooth hanger

Pillow and wall hanging together.

I happen to love to sew and am passionate about craftsmanship! So putting in all those zippers is pure satisfaction for me! When self doubt is in the air and self confidence is low, at least I can be happy with the perfect zipper insertion!

This is all reminding me about a teacher I had in art school years ago. He practiced making drums when he was feeling artistically blocked. This way he was still making something that challenged his craftsmanship and the end result brought him a wonderful sense of accomplishment and pride. I haven't thought about him for years. But I guess his drums are my pillows. Although I am not feeling particularly blocked! LOL

Here's another pillow. I actually have several of these, but each one is a little different. The front fabric is silk broadcloth. It was part of a failed dye job - a reject! One day I discovered that I actually loved the back side and began working with it again. And because I already have pillows on the brain and the fabric seemed to be more decorative that my version of fine art, I sewed all the pieces into 4 different art pillows. The back fabric is commercially dyed, but one I thought off set the silk beautifully. The stamps are of my creation. Then to make the front and back be more cohesive, I added the touches of applique and discovered the blanket stitch on my domestic machine! Who knew!

front

back

Seam with zipper

Detail

Don't forget to click on the images for a larger and closer view.


Custom Napkins

Last week, through my Etsy shop, I had my first order for 6 of my hand painted fat quarters stitched into napkins. It has been fun and relaxing to make these up. I'm tickled pink with how they came out. I really love craftsmanship especially when it comes to sewing.

Here is the progression of how I painted and sewed them minus photos of the orange and yellow background being painted. I did that with Jacquard Dye-na-flow paints in yellow, bright orange and salmon applied with a spray bottle on wet white cotton.

(Don't forget to click on the image for a larger view)

I started stamping with Jacquard Lumiere Pearl Turquoise.

Then came red. I mixed Maroon and True Red together to get the shade of red I was looking for.
You can see the three stamps I used here in this photo. It is actually only two stamps.
I carved the same crow going in both directions, so I wouldn't have to keep cleaning the stamp.

My cat Julian is in the back supervising.

I usually have a dish pan on my work table with an inch or two of water.
I put used brayers and stamps in it to limit the number of times I have to walk upstairs
to my closest water supply. I have an old tooth brush in the water to gently clean
the stamps with.
I love how the addition of red really makes the piece pop.
Then black! This is one of the finished fat quarters. They are all a little bit different.

These are the napkins all nicely stitched and folded.


I folded over some of the ends here so you can see my mitered corners.


All wrapped up!
 One thing that gets clearer and clearer for me every time I work in the studio is what my relationship is with me as an artist making wall hung, fine fiber art and me as a craftsmen designing fabric and making home decor items. Two different esthetics that sometimes overlap, but generally do not. One for having fun and making money (hopefully!) and one to feed my soul that might also make money but doesn't have to.

Click here to see the sample on Etsy! It is painted on silk, so the result is a bit softer.

I am linking this post up with Off the Wall Friday hosted by Nina Marie Sayer. Head on over to see what some other artists have been up to this past week!


A Week in Review


So as always, it has taken me a couple of weeks to get settled from a week away teaching. Plus we moved my son back to college in a rental house with some friends.

One of the lovely things for me about being away for a week of teaching is that life feels like it stands still. I tend to not follow the news during those times, and in the evenings I have quiet time by myself. 

My classroom at the Fletcher Farm was wonderful. One evening after I returned from town and dinner I spent some time puttering around my classroom. Students are allowed to work in the studios after dinner, but this particular evening I was alone. 

So with the doors open and the night sky pouring through the windows and doorways I worked in my art journal. I cut a few new stamps, got out a stencil and created this page. Cell service was almost non existent as was the internet. So it was just me and the crickets.

I have done a bit more on this page since I have gotten home, but this was the beginning.


Fletcher Farm Art School

I am back in Ludlow, Vt teaching at the Fletcher Farm Art School. It is definitly starting to feel like home away from home. I have had trouble with my iPad and the internet so I haven't been able to post all week. The little building pictured below is my classroom. I just love it! The other fun thing is that the kids art camp is happening at the same time. With my own kids well on their way to adulthood, I don't get much of an opportunity to see little ones at play. I am pleased to see that jump rope has not gone out of style!

My students are wonderful. As it turns out they are all related. So the classroom dynamic can be very funny!

Today is their 4th day so they are starting to really use all their new tools and techniques. I'll post some of pictures of their work later today. Bye for now!


Refreshed

So a good night's rest and a cup of strong latte this morning has made me clear headed again! I am at the Fletcher Farm Art School in Ludlow, Vt. It is a lovely place to teach. My stamping on fabric class is small so the students are moving at lightening speed! They cut and carved all day yesterday and briefly started painting. Today they can work at their leisure painting and making more stamps.


These classroom spaces are in a very large, old barn. The basket making class is next to ours. They have a large garage type door that opens up one whole side of their classroom. The road is only then yards away. I am fascinated with the view from my classroom door through the barn and across the street.


Breakfast and lunch are included with my lodging here at the farm. I didn't particularly care for yesterday's breakfast, so I headed into town this morning. Don't get me wrong, there wasn't anything wrong with the meal. I am just not much of an eggs and sauage kind of Gal.

At first it looked like Dunkin Donuts might be my only option. But then I discovered an adorable little coffee shop. I had the most srumptious sour cream coffee cake and my lattee. It was perfect! Plus I was totally charmed by the shop.


I'll be back here at the farm for my 5 day Textile Paint Extraviganza class in just a few short weeks.

Have a great day!


Fletcher Farm Art School

I am in Ludlow, Vt right now teaching stamp making for textiles. It is a great place and a great class. But I just can't get my photos to import to mt iPad. So I give up!

I am so tired. So off I go to bed.

I'll post tomorrow after I get home. Hope you are all having agreat weekend. It is simply gorgeous here in Southern New England.